
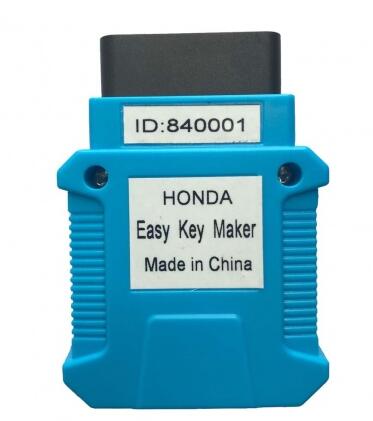
Honda Key Programmer Cover all Honda/Acura equipped with OBDII-16 socket from 1999 to 2018
Highlights:
a) Easy to use. Register keys full automatically. User just turns ignition ON/OFF.
b) Register keys fast. Finish registration in minutes.
c) Small package and easy to carry. Can be hold in one hand.
The device is for registering key by OBDII. Cover all Honda/Acura equipped with OBDII-16 socket from 1999 to 2018. Support both transponder key and smart key registration in the following scenarios:
Functions:
a) Add key
b) All keys lost
c) Replace IMMOBI
d) Replace ECM/PCM
e) Replace MPCS/MICU/IMOES
f) Replace smart entry
g) Replace key knob
h) Remote learning
Operation Instructions:
For transponder key.
1.Switch to “IMMO”, and prepare all keys to register.
2.Turn ignition ON to position II(Instrument panel light on but engine OFF), connect programmer to OBDII socket
3.The buzzer periodically short beep with “Di”, Turn ignition OFF.
4.The buzzer periodically short beep with “Di, Di, Di”, turn ignition on without changing key.
5.The buzzer long beep once “Di—“, key registration begins.
6.The buzzer periodically short beep with “Di”, Turn ignition OFF.
7.The buzzer periodically short beep with “Di, Di”, Change another key and turn ignition ON
8.Repeat step F,G, register more up to 6 keys.
9.For last key: First turn ignition ON/OFF following above instructions. When the buzzer periodically short beep with “Di Di”, turn on ignition WITHOUT changing key. Then the buzzer periodically short beep with “Di”, DO NOT turn off ignition and keep ignition on for more than 20 seconds.
10.The buzzer long beep once “Di—“, key registration finished.
11.The buzzer periodically long beep with “Di—“, start to learn remote function. Learning remote function instruction: close all doors, press and release lock/unlock button on key in 4 seconds until door locks lock/unlock. Then learn next remote.(Some cars do not need remote learning, and no buzzer beep tips for learning remote)
12.Turn ignition OFF. Pull out programmer from OBDII. Try to start engine with every key.
For smart key
1.Switch to “SMRT”, and prepare all smart cards to register. Only 1 card in car, and the others out of car.
2.Push one-push-start button, or use ignition key in card, turn ignition ON(Instrument panel light on but engine OFF). If all cards lost and can’t turn ignition on, press and hold one-push-start button. Connect programmer to OBDII socket.
3.The buzzer periodically short beep with “Di”, turn ignition OFF
4.The buzzer periodically short beep with “Di, Di, Di “, turn ignition ON.
5.The buzzer long beep once “Di—“, card registration begins.
6.The buzzer periodically short beep with “Di”, take card out of car.
7.The buzzer periodically short beep with “Di, Di”, take another card in car.
8.Repeat step F,G, register more up to 6 cards
9.For last card: First take card in car following instruction. When the buzzer periodically short beep with “Di”, DO NOT take card out of car and keep card in car for more than 100 seconds.
10.The buzzer long beep once “Di—“, cards registration finished.
11.Turn ignition OFF. Pull out programmer. Try to start engine with every card.
Key Programming Technical Specifications:
a) Voltage & Current Requirements 8V – 18V DC (12V nominal) at 4 Amps (maximum)
b) Vehicle Protocols
– DIAGH
– CAN
– ISO-9141
– ISO-14230
c) Vehicle Connection Molded DLC
d) Dimensions H:22mm (0.87in) W:54mm (2.13in) L:76mm (2.99in)
e) Weight 50g (1.76oz)
f) Environmental Operating: -20oC to 45oC (-4oF to 113oF) at 15% to 85% RH non-condensing
Appearance Detail :


a) Key Type Switch
IMMO: Transponder key
SMRT: Smart key
b) LED Status Indicators
ON: Power ON
OFF: Power OFF
c) Buzzer
– Long beep once “Di—” (Beep ON continuous for 3 seconds)
– Long beep periodically with “Di—“(Beep ON for 1 second and OFF for 1 second, and repeat)
– Short beep periodically with “Di” (Beep ON for 100 milliseconds, OFF for 900 milliseconds, and repeat)
– Short beep periodically with “Di, Di” (Beep ON for 100 milliseconds, OFF for 100 milliseconds, ON for 100 milliseconds, OFF for 700 milliseconds, and repeat)
– Short beep periodically with ” Di, Di, Di” (Beep ON for 100 milliseconds, OFF for 100 milliseconds, ON for 100 milliseconds, OFF for 100 milliseconds, ON for 100 milliseconds, OFF for 500 milliseconds, and repeat)