Search site

Contact

Car diagnostic tools information by obd2tool

https://www.obd2tool.com

Welcome to my blog,here some auto diagnostic tools will be displayed. If you want to know more information,you can visit our official website: www.obd2tool.com.

lovelily750@gmail.com

News

Visitors notice

12/01/2014 07:47
Let your visitors know about news and events on your website as often as possible. You need to keep your website up-to-date so that your visitors will get used to visiting your pages regularly. You can use RSS feeds to deliver new articles directly to your readers.

Website launched

12/01/2014 07:46
Our new website has been launched today. Tell your visitors why you have started a new presentation and how it benefits them. Mention your goals and project advantages. Try to briefly give your visitors reasons why they should return to your pages.

The blog of OBD2 TOOL

How to Solve Xhorse Dolphin XP005 “Error 56, Error code 6”

09/30/2021 20:33
Problem I have successfully cut 3 keys via Xhorse Dolphin XP005 + VVDI Key Tool Max until the 4th key, it prompted “Error:56. The cutter is short-circuited, please check the cutter conductivity. Please take photo and send to technical support.” The error still exits even if I use other devices to...

VXDIAG VCX SE Benz License Expired Solution

09/16/2021 11:07
Here share the solution to resolve VXDIAG VCX SE Benz license expired problem. Problem: Hello, I’m getting again that license expired… Can you help me please? I try to update the license, but it prompts “update license failed. Retry! Error Code: 0”. Can you explain to me exactly how to...

Super MB Pro M6 vs. C4 vs. C6

09/16/2021 11:02
Do you know how to choose MB Star Diagnostic Tool? Here we have picked out 4 to make a comparison. Let’s find what are the differences between them. This post is available with Mercede Benz diagnostic tools, include reviews and comparison of Benz VCI C6, Benz OEM C6, Benz ECOM, SD Connect C4, SD...

How to Reset OBDSTAR X300 DP Plus to Solve Register Failure Problem

07/31/2021 15:49
Here share the method to solve OBDSTAR X300 DP PLUS register failure problem by resetting the device. Customer problem: When I turned on my x300 dp plus, and tapped teamviewer to register, the registration interface appeared, but quickly jumped back to the user login interface. I tried it many...

How to update the firmware of ICOM NEXT A

07/31/2021 15:25
Upgraded the new version of BMW Diagnostic Software ISTA. When connected to the vehicle, click to start the vehicle to detect ICOM, but the State is Firmware. At this time, you need to upgrade the firmware of BMW ICOM Next; ICOM NEXT A firmware upgrade steps 1. First, you need the firmware...

Ford VCM II firmware update or downgrade

06/25/2021 11:33
It’s confirmed that Ford VCM II Firmware Update And Downgrade is possible, Operation steps guide here (This guide applies to all vcmii tools) Procedure: Remove the rubber case shown below. Connect the USB cable to the VCM2 device and hold the (ReSet) button shown as below. Connect the other...

Top 5 Launch X431 Diagnostic Tool Review 2021

05/27/2021 09:45
Launch X431 Diagnostic Tool is one of best and professional car diagnostic tools in the automotive aftermarket. Launch X431 is aim to provide the most innovative and cost-effective solutions for auto diagnosis work. Launch X431 series diagnostic tool have full line device to meet different...

How to update BMW ICOM A2 or ICOM NEXT Firmware

05/27/2021 09:41
When using the latest ISTA D software to do BMW diagnosis, icom hareware can be detected, but the device doesn’t communicate with the vehicle,  can’t enter modules reading page, like below picture: What’s the solution? The firmware doesn’t match with the  latest ISTA sofware, firmware...

Active Hidden Function via X431 PRO for Toyota Reiz 2015

05/13/2021 16:34
Here we will show you how to active hidden function by X431 PRO for Toyota Reiz 2015. Function has been already tested on Toyota below: Automatic padlock Switch off the ignition about 30S/60S/120S Automatic padlock setting; 3 Press Remote control one time or twice to unlock setting.; 4....

Benz W211 Gearbox Programming & Coding by Launch X431

04/09/2021 17:15
After replacing gearbox valve body or gearbox ECU, it is required to perform programming and coding. If still unable to engage the gear or the gear is locked at 3rd gear position, Gearbox Self-learning shall be performed.When strong shock is felt during gearshift, perform this function.So here...
<< 1 | 2 | 3 | 4 | 5 >>

How to Configure WiFi and USB for Original JLR DoIP VCI

03/28/2021 17:08

Part 1: How to Configure WiFi for Original JLR DoIP VCI /setup wireless connection?

Original Jaguar Land Rover diagnostic tool JLR DoiP VCI supports both USB and WiFi connection. Here’s the guide to configure the LAN setting.

How-to-Configure-WiFi-and-USB-for-Original-JLR-DoIP-VCI-1 (2)

Procedure:

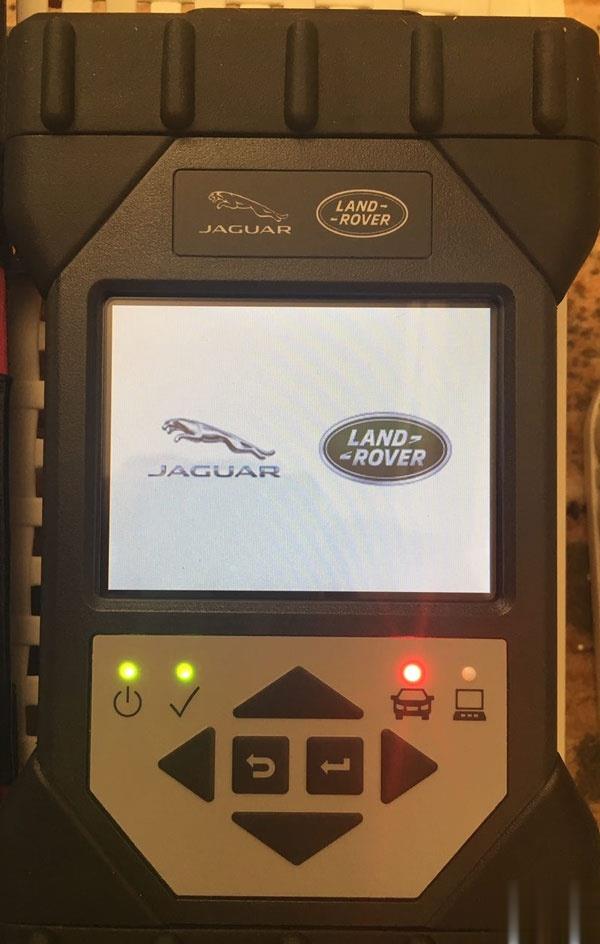
Connect JLR DoiP VCI W-F interface with vehicle

Connect the other end of VCI with laptop via USB cable

How-to-Configure-WiFi-and-USB-for-Original-JLR-DoIP-VCI-2 (2)

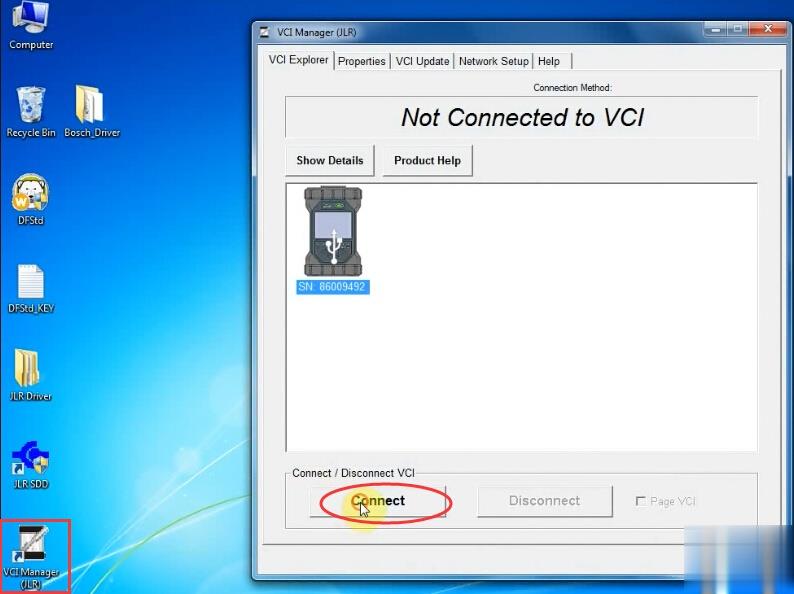
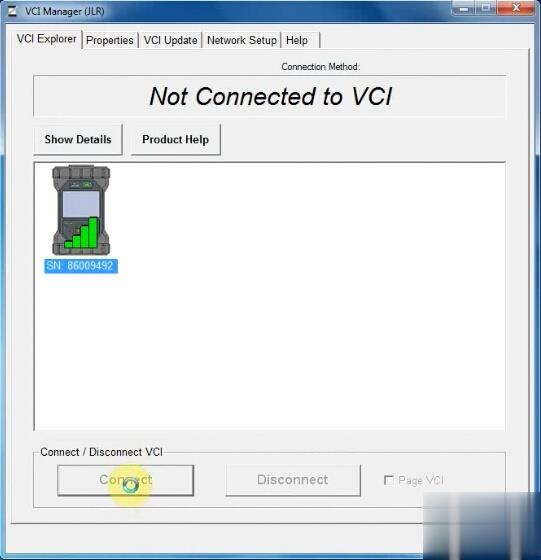
Open VCI Manager (JLR), press Connect

How-to-Configure-WiFi-and-USB-for-Original-JLR-DoIP-VCI-3 (2)

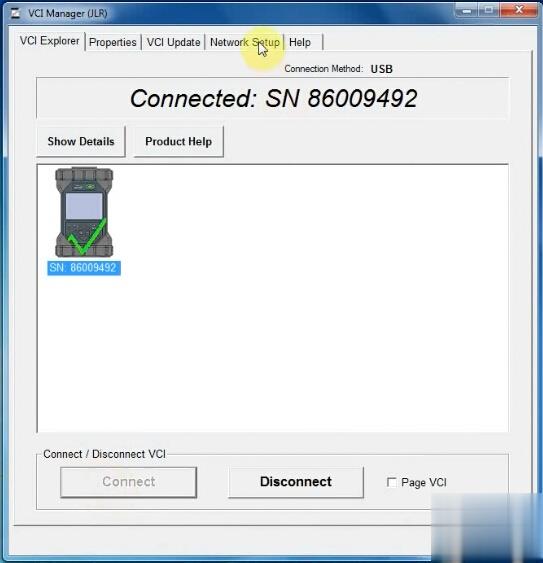
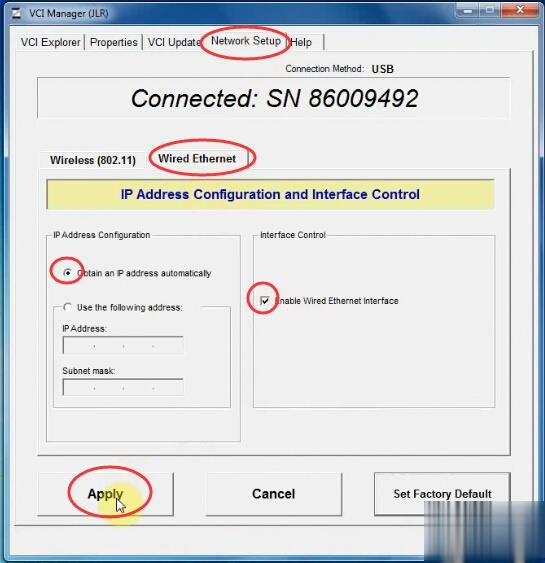
Choose Network Setup tab->Wired Etherent
How-to-Configure-WiFi-and-USB-for-Original-JLR-DoIP-VCI-4 (2)
Tick Enable Wired Etherent Interface

How-to-Configure-WiFi-and-USB-for-Original-JLR-DoIP-VCI-5 (2)

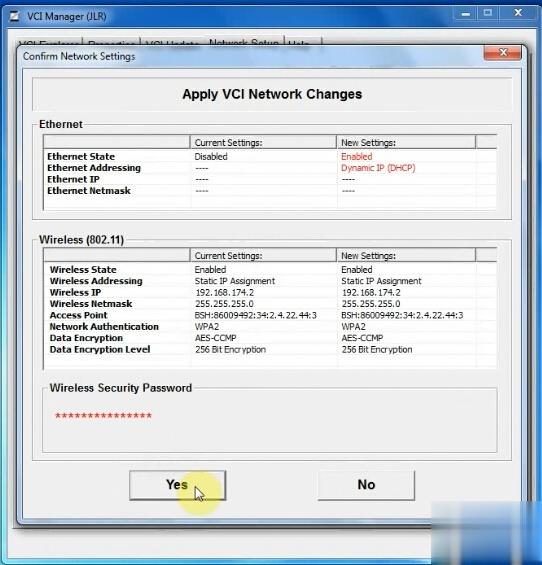
Press Apply button and Yes

How-to-Configure-WiFi-and-USB-for-Original-JLR-DoIP-VCI-6 (2)

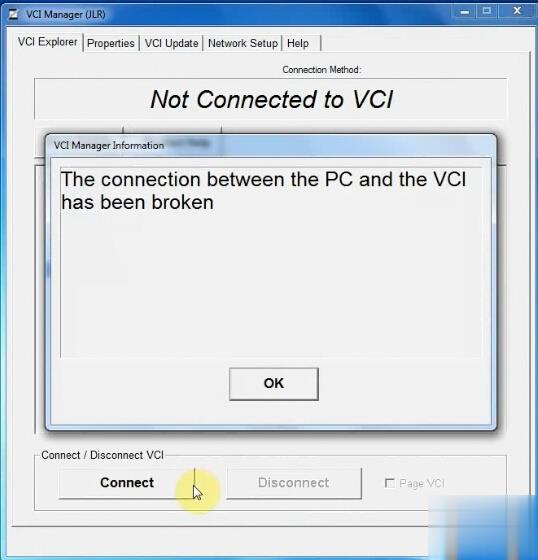
Then disconnect USB connection

Close VCI Manager

Open VCI Manager again

Press Connect

Go to Network Setup->Wired Etherent

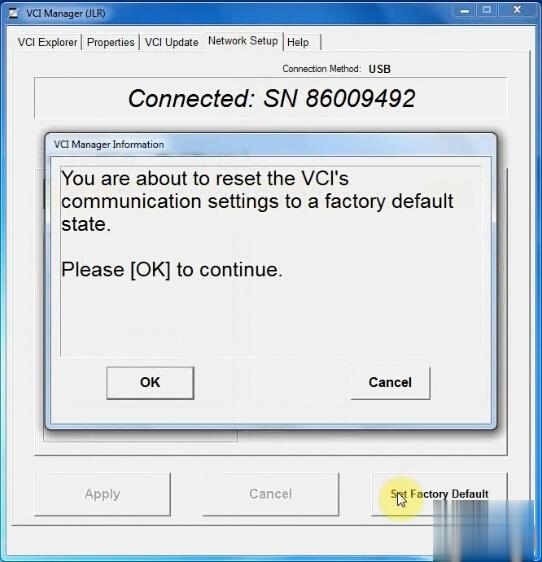
Press Set Factory Default

How-to-Configure-WiFi-and-USB-for-Original-JLR-DoIP-VCI-7 (2)

Press OK if system prompts you are about to reset the VCI communication settings to a factory default state.

How-to-Configure-WiFi-and-USB-for-Original-JLR-DoIP-VCI-8 (2)

Enable network connection

Press Set Factory Default again

How-to-Configure-WiFi-and-USB-for-Original-JLR-DoIP-VCI-9 (2)

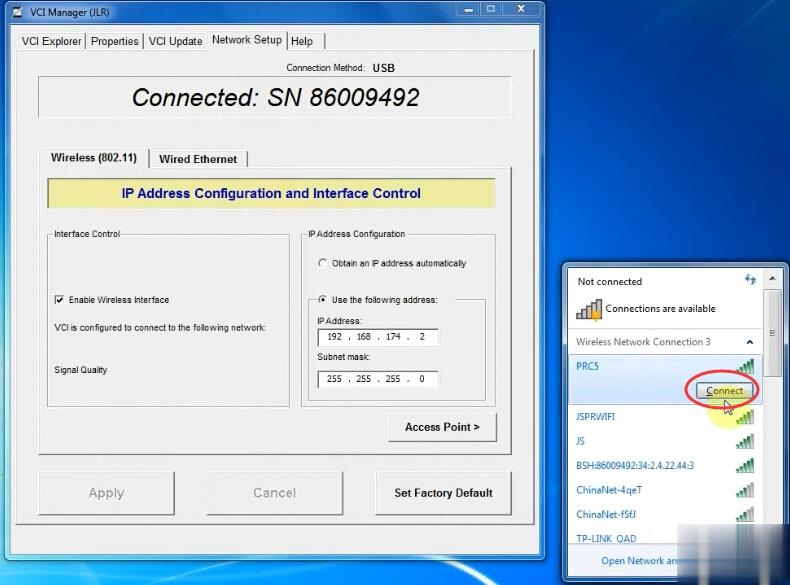
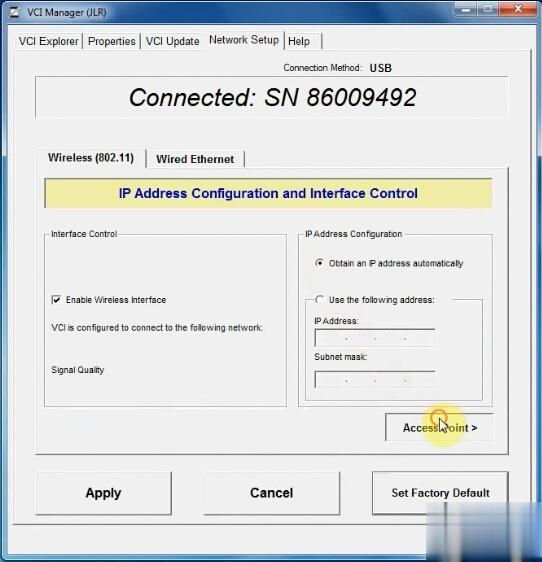
In Wireless (802.11), choose Obtain an IP address automatically, then press Access Point

How-to-Configure-WiFi-and-USB-for-Original-JLR-DoIP-VCI-10 (2)

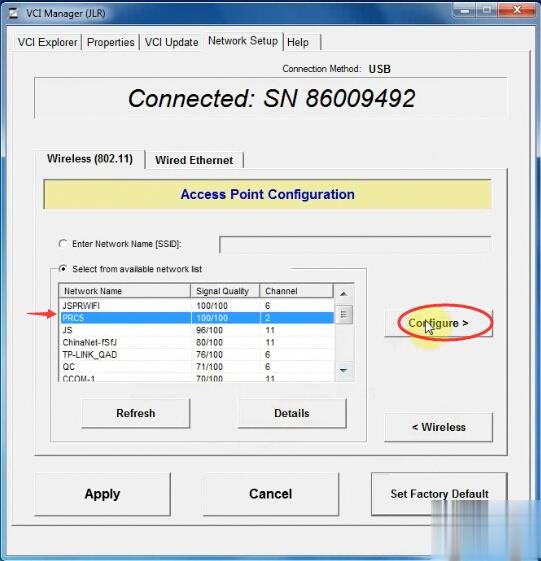
Choose Wireless resource which is the same as the your network
Press Configure

How-to-Configure-WiFi-and-USB-for-Original-JLR-DoIP-VCI-11 (2)

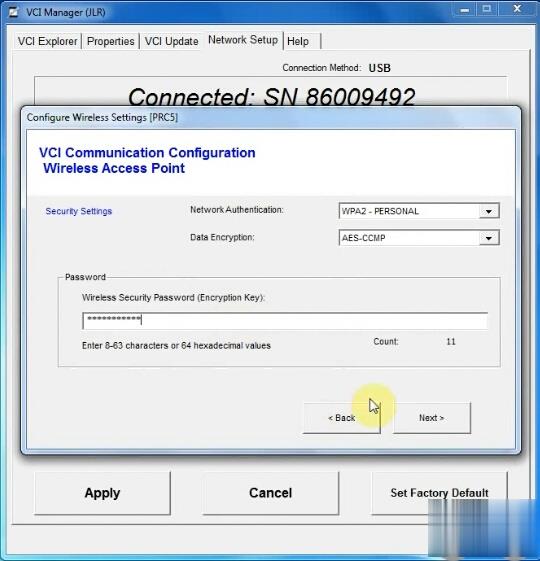
Enter wireless security password (encryption key)

Press Next

How-to-Configure-WiFi-and-USB-for-Original-JLR-DoIP-VCI-12 (2)

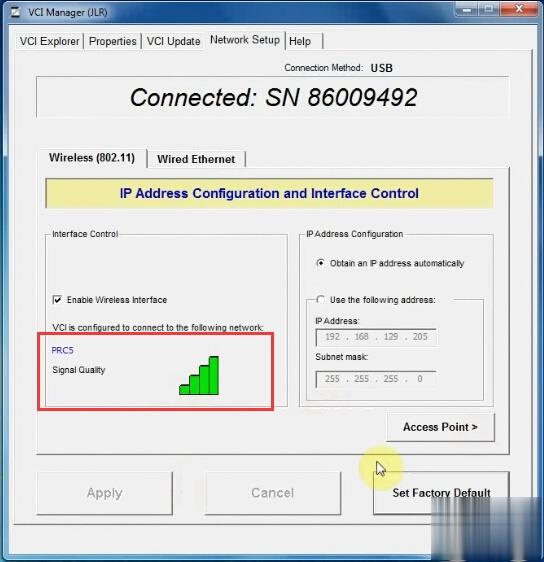
JLR VCI is configured to connect to your network

Disconnect and then Connect VCI

How-to-Configure-WiFi-and-USB-for-Original-JLR-DoIP-VCI-13 (2)

It shows WiFi connection is done

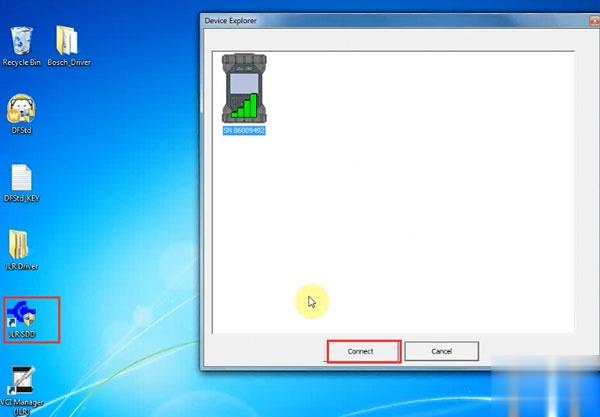
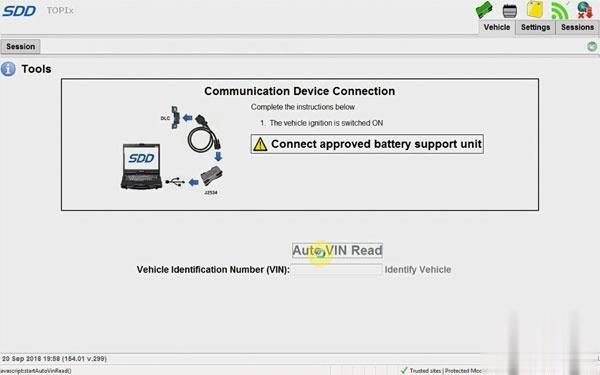
Open JLR SDD software on desktop

How-to-Configure-WiFi-and-USB-for-Original-JLR-DoIP-VCI-14 (2)

Press Connect

How-to-Configure-WiFi-and-USB-for-Original-JLR-DoIP-VCI-15 (2)
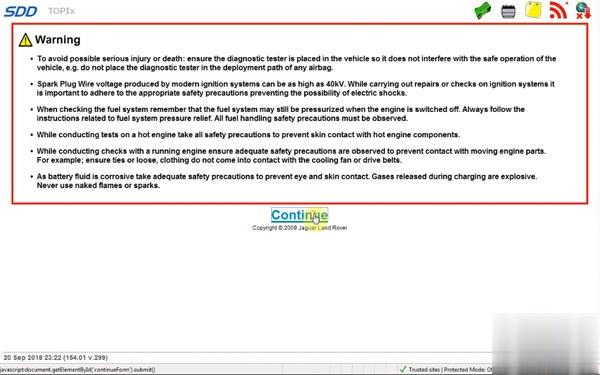
Now you can run SDD software for diagnosis
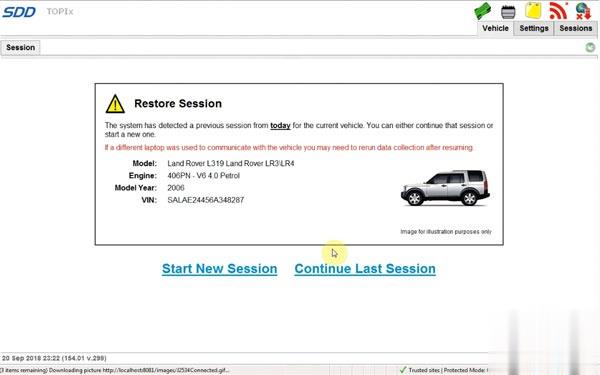
How-to-Configure-WiFi-and-USB-for-Original-JLR-DoIP-VCI-16 (2)

How-to-Configure-WiFi-and-USB-for-Original-JLR-DoIP-VCI-17 (2)
Part 2: How to connect JLR DoIP VCI via USB

To setup USB connection, you need to download Bosch driver for VCI first:

https://mega.nz/#!aqwnhbQS!KS7QhERmZ4cCcZfvT2iXkdYN6ynz9vDQ3DmPQRGm0TU

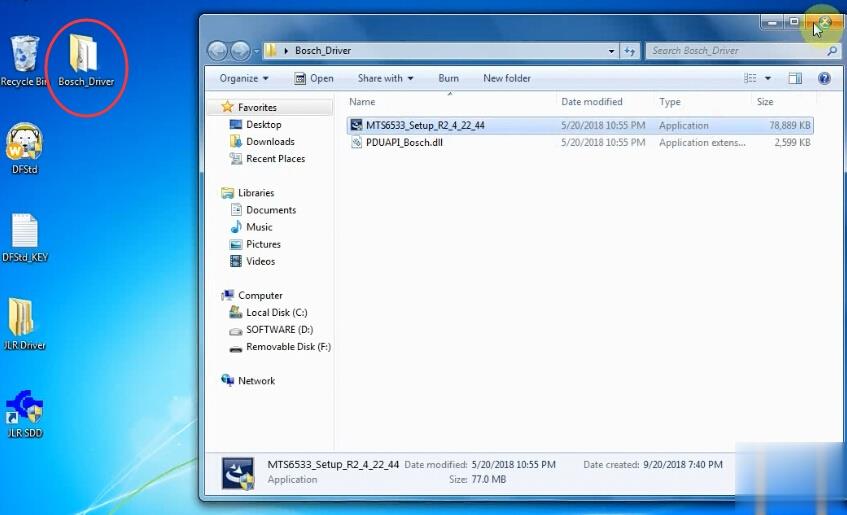
Open Bosch_Driver folder
How-to-Configure-WiFi-and-USB-for-Original-JLR-DoIP-VCI-18 (2)
Open MTS6533_Setup

How-to-Configure-WiFi-and-USB-for-Original-JLR-DoIP-VCI-19 (2)
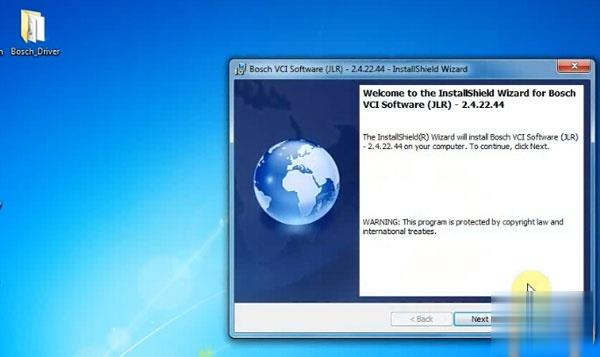
Install Bosch VCI Software (JLR)
Press Next
Press Next
Press Install
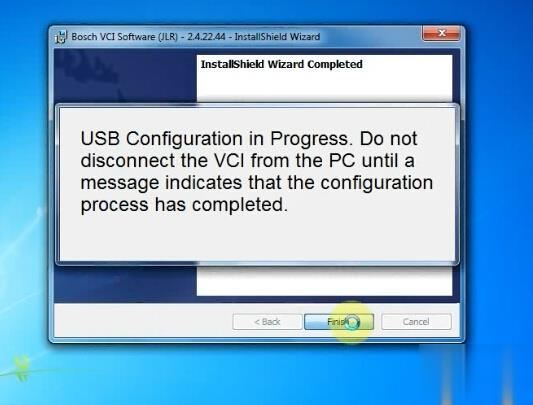
Finish installing Bosch VCI software
How-to-Configure-WiFi-and-USB-for-Original-JLR-DoIP-VCI-20 (2)
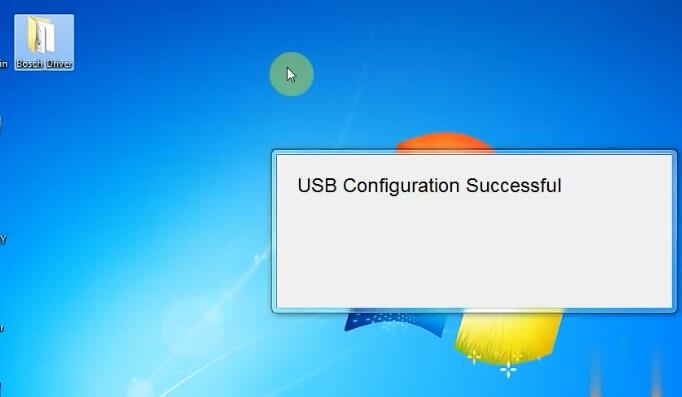
USB Configuration in progress. Don’t disconnect JLR VCI from PC until a message indicates that the configuration process has completed.

How-to-Configure-WiFi-and-USB-for-Original-JLR-DoIP-VCI-21 (2)

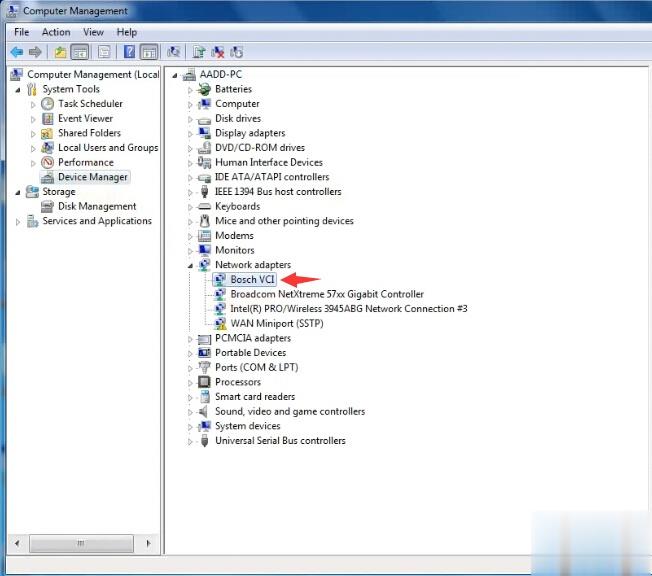
Open Device Manager to check the Bosch JLR DoIP VCI adapter is well connected

How-to-Configure-WiFi-and-USB-for-Original-JLR-DoIP-VCI-22 (2)

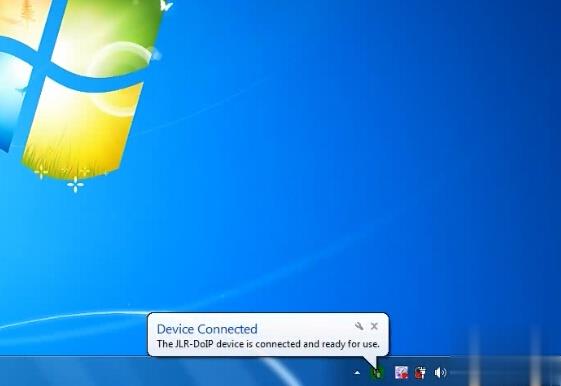
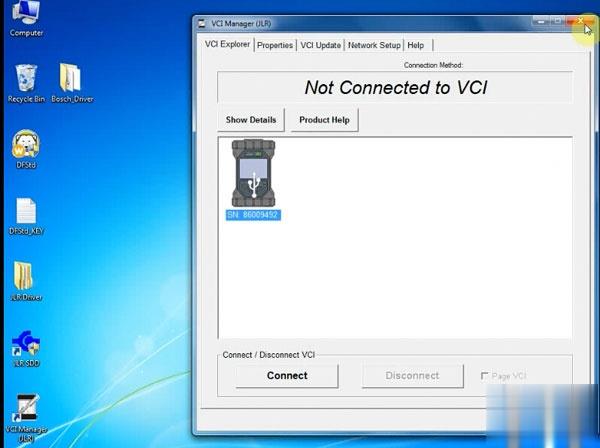
Open VCI Manager on desktop to make sure the Manager detect JLR VCI which indicates interface is well connected

How-to-Configure-WiFi-and-USB-for-Original-JLR-DoIP-VCI-23 (2)

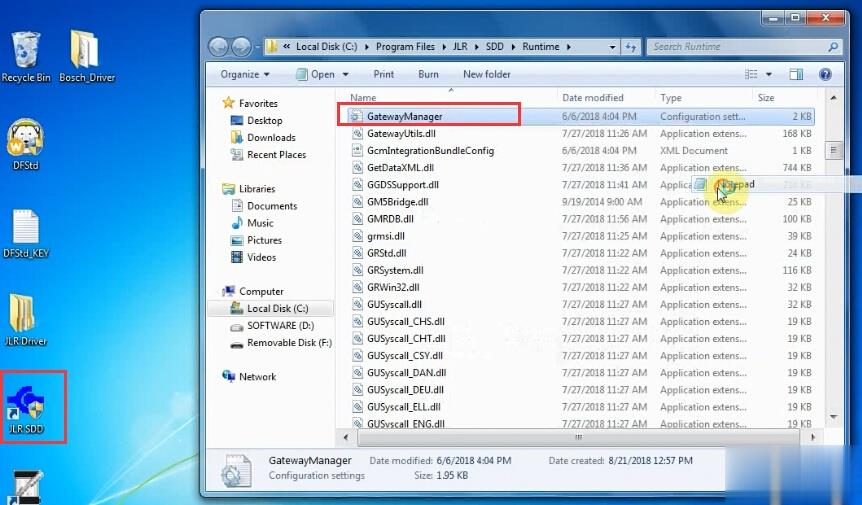
Right click JLR SDD software on desktop->Find File location C:/Program Files/JLR/SDD/Runtime

How-to-Configure-WiFi-and-USB-for-Original-JLR-DoIP-VCI-24 (2)

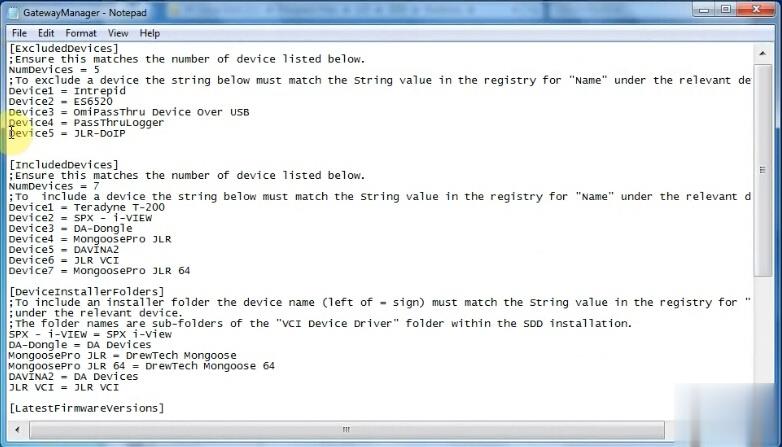
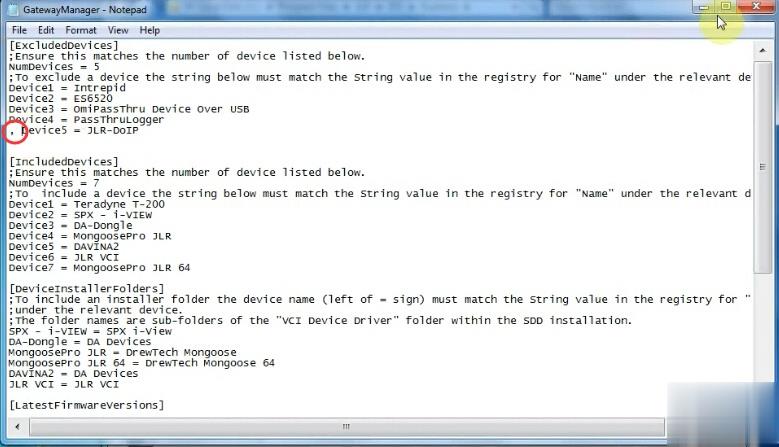
Open the GatewayManager with Notepad
Find “Device5 = JLR-DOIP” and change value to “,  Device5 = JLR-DOIP”

How-to-Configure-WiFi-and-USB-for-Original-JLR-DoIP-VCI-25 (2)

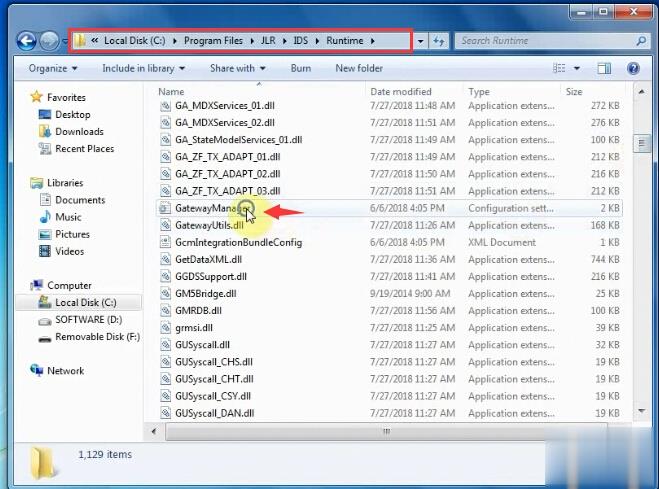
Find Go to C:/Program Files/JLR/IDS/Runtime
How-to-Configure-WiFi-and-USB-for-Original-JLR-DoIP-VCI-26 (2)
Open the GatewayManager with Notepad
Find “Device5 = JLR-DOIP” and change value to “,  Device5 = JLR-DOIP”

How-to-Configure-WiFi-and-USB-for-Original-JLR-DoIP-VCI-27 (2)

Setup completed.

Now you can run JLR SDD and Pathfinder software

How-to-Configure-WiFi-and-USB-for-Original-JLR-DoIP-VCI-28 (2)