Welcome to my blog,www.obd2tool.com.

Search site
Contact
Car diagnostic tools information by obd2tool
https://www.obd2tool.com
Welcome to my blog,here some auto diagnostic tools will be displayed. If you want to know more information,you can visit our official website: www.obd2tool.com.
News
Visitors notice
12/01/2014 07:47Website launched
12/01/2014 07:46The blog of OBD2 TOOL
How Launch X431 V+ X431 PRO3 wins maxgo, snap on scanners, OTC
09/12/2020 11:05FIAT Viaggio 2012 Seatbelt ReminderAlert Activation by Launch X431
08/25/2020 18:05How to do Actuation Test by Launch Thinkcar Thinkdiag
08/25/2020 17:57Possible to use Digiprog 3 v4.94 for Porsche Cayman odometer correction
08/11/2020 10:12Digiprog 3 Chrysler/Jeep/Dodge Odometer Correction Car List and Wiring
08/11/2020 10:04ODIS SOFTWARE DOWNLOAD
06/15/2020 21:06ORANGE5 PLUS V1.35 VS. ORANGE5 V1.34
06/15/2020 21:03Newest 2020.05 Version BMW ICOM NEXT A +B + C,ICOM A2,A3+B+C Software Released
06/02/2020 12:082014 Toyota“Fault Code”C1515 “Torque sensor zero adjustment is not complete” Operation method
06/02/2020 12:01How to fix 2007 vauxhall corsa no comms with GM MDI2 tech2 win
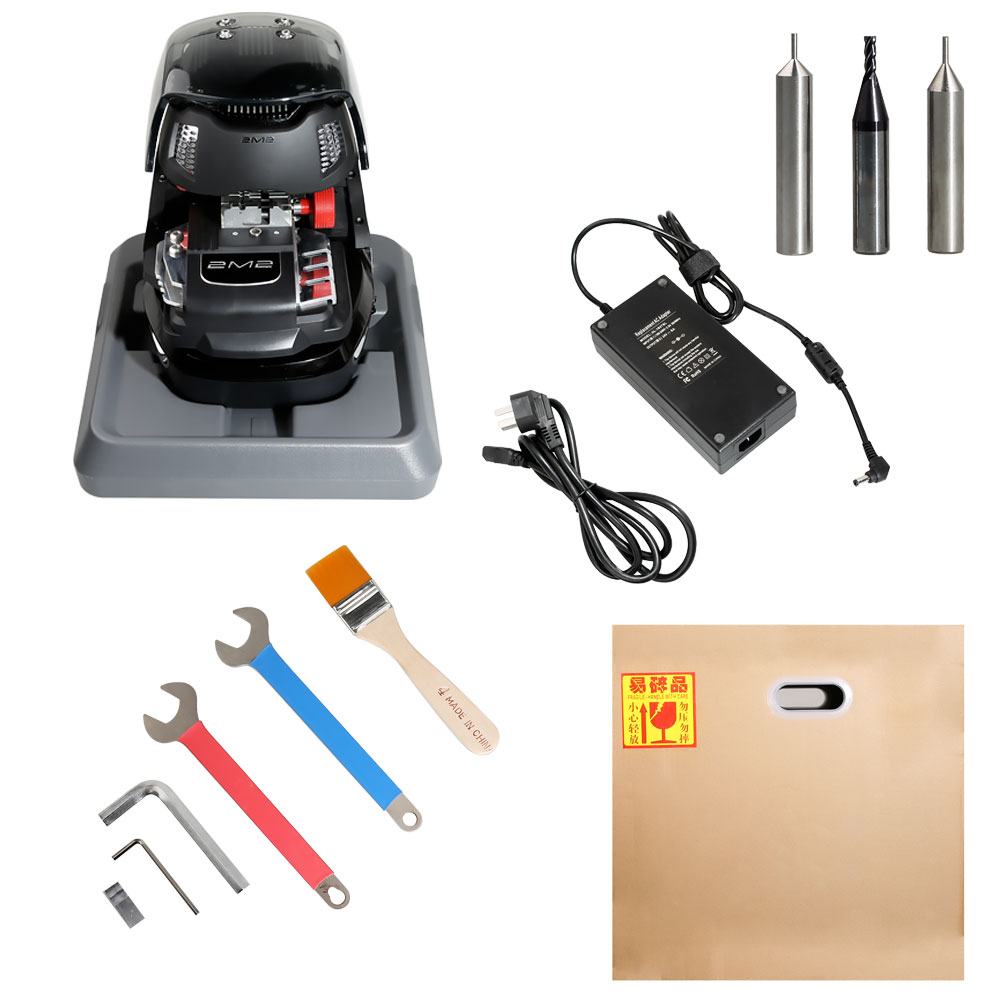
05/05/2020 18:11How to Use 2M2 Tank Magic Automatic Car Key Cutting Machine?
2M2 Magic Tank car key cutting machine is the update version of V8/X6,you can use mobile phone to operate key cutting proceed as Xhorse Dolphin.
2M2 Magic Tank Cutting Machine Support Vehicle List:
Europe:
For ALFAROME, For AUDI, For BMW, For CITROEN, For FERRARI, For FIAT, For FORD-EU, For HOLDEN, For IVECO, For JAGUAR,For LANCIA, For LAND ROVER, For LDV, For MAN, For MASERATI, For MERCEDES-BENZ, For MINI, For OPEL, For PEUGEOT,For PORSCHE, For RENAULT, For ROVER, For SAAB, For SEAT, For SKODA, For VAUXHALL, For VOLKSWAG, For VOLVO
USA:
For BUICK, For CADILLAC, For CHEVROLE, For CHRYSLER, For DODGE, For FORD-USA, For HUMMER, For LINCOLN, For MERCURY
Japan & Korea:
For ACURA, For DAIHATSU, For HONDA, For HYUNDAI, For INFINITI, For KIA, For LEXUS, For MAZDA,For MITSUBIS, For NISSAN, For SSANGYON, For SUBARU, For SUZUKI, For TOYOTA
How to Change Cutter and Probe for 2M2 Tank Machine?
Rotate the handwheel to move the middle clamp to the left.

Let the middle clamp completely against the left clamp

Insert the cutter/probe to the top

Let the middle clamp completely against the left clamp

Loosen the fixing screw of the probe.pull the probe down until the clamp platform,then tighten the screw to complete the operation

Pull the probe down until it touch the clamp platform,then tighten the screw.

How to Fix Key on 2M2 Key Cutting Machine Clamp?
162-T Key:
Please set the key embryo in the left side

Let the front end of the key close to the first slot and does not exceed it.

The key remains level on the platform and clamp it

FLAT Key
Please set the key embryo in the right side

Left the front end of the key close to the first slot and does not exceed it

The key remains level on the bottom and clamp it

FLAT Key Shoulder:
Use the stop and insert it to the right slot

Block the key shoulder and clamp it.

HU64 Key:
Use an HU64 clamp,insert the key and then tighten the screws

Set the HU64 clamp to the bottom of the clamp in the right side and clamp it

Attention,the HU64 clamp must be against this side

HU66 Key
Please set the keyembryo in the right side

Block the key shoulder with the edge of the clamp

The key remains level on the bottom and clamp it

LASER Key
Please set the keyembryo in the left side:
Let the front end of the key close to the first slot and does not exceed it

The key remains level on the bottom and clamp it

Laser Key Shoulder:
Use the stop and insert it the left slot

Block the key shoulder and clamp it.
