Search site

Contact

Car diagnostic tools information by obd2tool

https://www.obd2tool.com

Welcome to my blog,here some auto diagnostic tools will be displayed. If you want to know more information,you can visit our official website: www.obd2tool.com.

lovelily750@gmail.com

News

Visitors notice

12/01/2014 07:47
Let your visitors know about news and events on your website as often as possible. You need to keep your website up-to-date so that your visitors will get used to visiting your pages regularly. You can use RSS feeds to deliver new articles directly to your readers.

Website launched

12/01/2014 07:46
Our new website has been launched today. Tell your visitors why you have started a new presentation and how it benefits them. Mention your goals and project advantages. Try to briefly give your visitors reasons why they should return to your pages.

The blog of OBD2 TOOL

OBDSTAR DP PLus is OK on Renault ESpace Megane Scenic Talisman key program

05/19/2019 16:25
Renault (ESpace, Megane, Scenic, Talisman) key programming has solution now, that is OBDSTAR X300 DP PLUS + one OBD2 convertor of the packed P001 adapter. It can program keys for these Renault cars via OBD. A nice feature is the DP plus system comes with key info, pictures, tips and remote...

How to Use Autel MaxiSYS Elite to Diagnose Vehicle

04/19/2019 11:12
  Autel Maxisys Elite enables technicians to quickly access the Electronic Control Unit(ECU) and scan,diagnose and clear faults on the numerous system modules controlling almost every automotive make and modules controlling almost every automotive make and model on the road today.And...

How to solve the problem that BMW ICOM A2 A3 host can’t be connected

04/14/2019 23:23
After the BMW ICOM host is connected to the car via a 16 PIN connector, and the other side is connected to the computer via a network cable. Your OBD2 Scanner BMW ICOM lan and system lights will light up. As follows: But at this moment,the host can’t be found in the computer.As follows: When...

Lonsdor K518ise Latest Update SCION

04/07/2019 11:34
Lonsdor K518ISE Key Programmer Latest Update on March 14,2019, Update for Scion,Smart,Audi,Pontiac: SCION\CH-R\2018\Smart key SCION\CH-R\2018\mechanical key SCION\FR-S\2013-2016\Smart key SCION\FR-S\2013-2016\mechanical key SCIONN\IA\2016-2018\Smart key SCION\IM\2017-2018\mechanical...

Mercedes Star Diagnostic Review

04/01/2019 17:29
The Mercedes Star diagnostic tool comes in a variety of formats such as C3, C4 and MB SD Connect C5. The C3 and C4 are very similar, just the difference is that the MB Star C4 is smaller and lightweight, which is very useful due to the C3 being a task in itself setting it up. The C5 is the...

How to Change the Peugeot 2004 BSI HC05 Mileage by OBDSTAR X300 DP

03/27/2019 10:38
OBDSTAR X300 DP Change Mileage on Peugeot 2004 BSI HC05 OBDSTAR X300 DP/X300 Pro3/Key Master/Key Master DP has released free Pin code reading, ecu auto identification, eeprom read/write, odometer correction features for Peugeot/Citroen/DS models: OBDSTAR X300 DP PAD is characterized by...

2019 Lonsdor K518S VS K518ISE

03/15/2019 15:33
The same: IMMO capabilities + Vehicle coverage. The difference: The update subscriptions, Lonsdor K518S offers 3 optional subscriptions. Key Programmer Lonsdor K518S: 1.Basic packagewith lifetime update 2.fullpackage (free update for first 6 months) + one-year subscription(800USD) 3.lifetime...

How to clean Z axis on SEC-E9 Key Cutting Machine

03/06/2019 14:28
Please clean Z axis on the SEC-E9 Key Cutting Machine when it pops up the error “Z limit surpassed” Error message: Z límite sobrepasado (Spanish) Z limit surpassed (English) sec-e9-key-cutting-machine-Z-axis-limit-surpassed How to clean Z axis on SEC-E9: Please follow the video and clean Z...

Why Dell D630 is necessary for MB SD Connect C4 Diagnosis

02/16/2019 16:50
Nowadays, MB SD Connect Compact 4 Plus Dell D630 is favored by the Mercedes owners. But there are lots of people puzzled whether it is necessary to buy Dell D630 laptop for MB SD C4. Recently, we obd2tool.com customer service have searched a great deal of customer feedback from different forum, and...

VXDIAG MB SD Connect C6 MB Star C6 Benz Diagnostic Tool with DOIP&AUDIO Function Better than MB STAR C4C5

02/09/2019 14:31
Original VXDIAG For XENTRY Diagnosis VCI VXDIAG For XENTRY Diagnosis DoIP Pass Through Interface VXDIAG For XENTRY Diagnosis VCI is the latest interface for For Mercedes & SMART vehicles can replace Star C4/C5. VXDIAG For XENTRY Diagnosis VCI acts as a Pass-through Interface, also called MB...
<< 7 | 8 | 9 | 10 | 11 >>

How to Configure WiFi and USB for Original JLR DoIP VCI

03/28/2021 17:08

Part 1: How to Configure WiFi for Original JLR DoIP VCI /setup wireless connection?

Original Jaguar Land Rover diagnostic tool JLR DoiP VCI supports both USB and WiFi connection. Here’s the guide to configure the LAN setting.

How-to-Configure-WiFi-and-USB-for-Original-JLR-DoIP-VCI-1 (2)

Procedure:

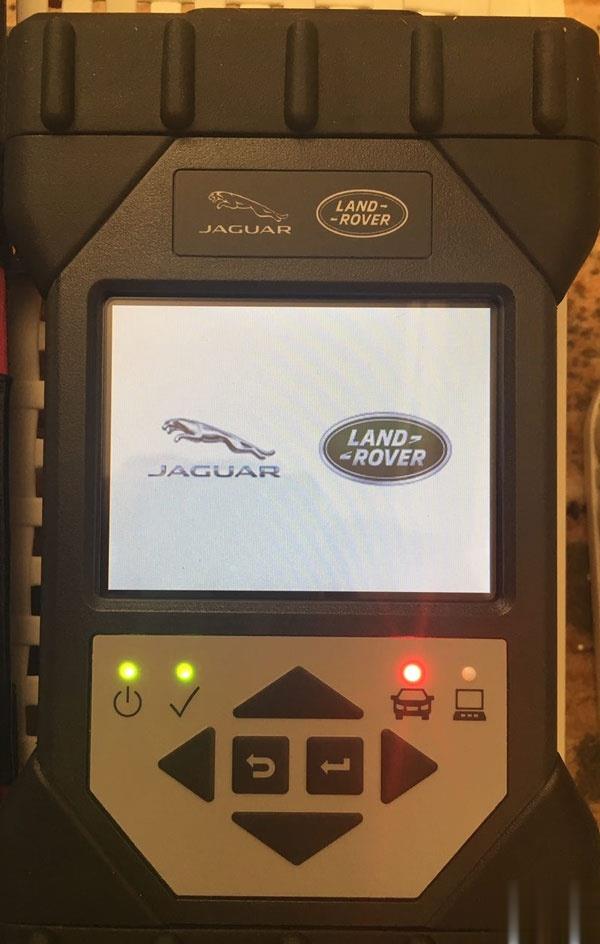
Connect JLR DoiP VCI W-F interface with vehicle

Connect the other end of VCI with laptop via USB cable

How-to-Configure-WiFi-and-USB-for-Original-JLR-DoIP-VCI-2 (2)

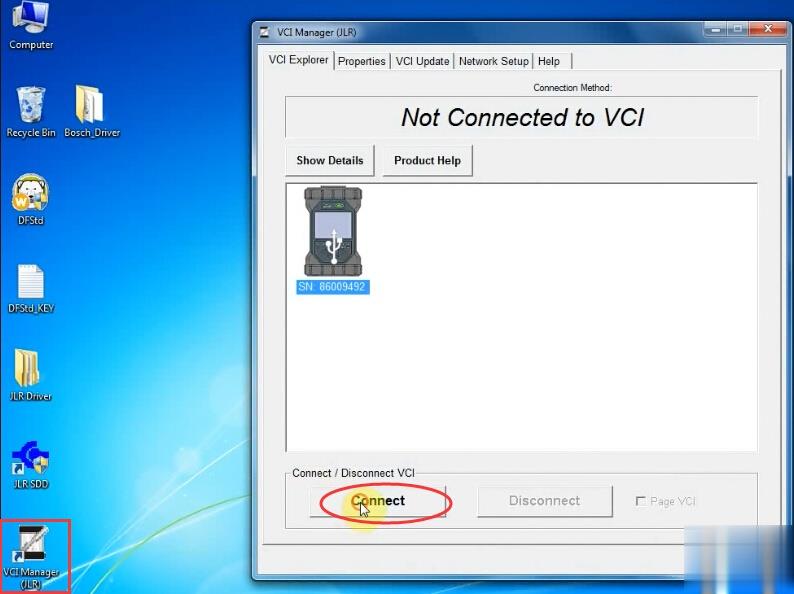
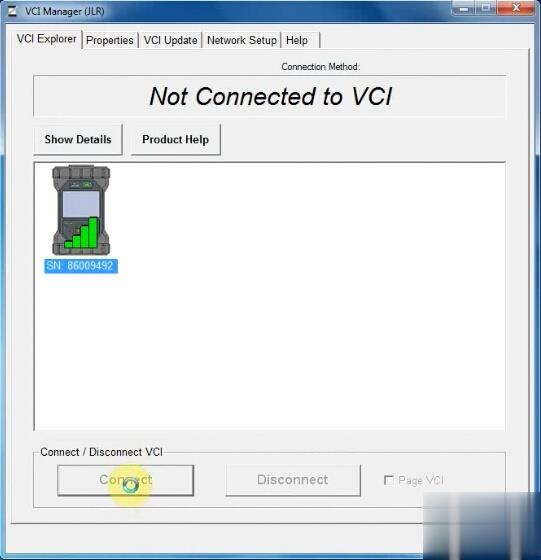
Open VCI Manager (JLR), press Connect

How-to-Configure-WiFi-and-USB-for-Original-JLR-DoIP-VCI-3 (2)

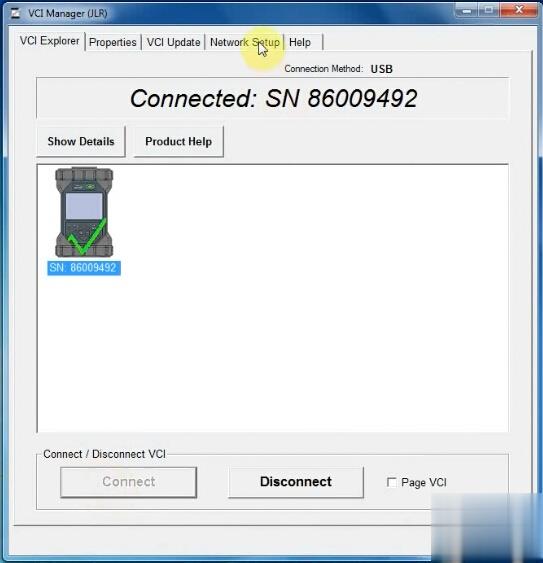
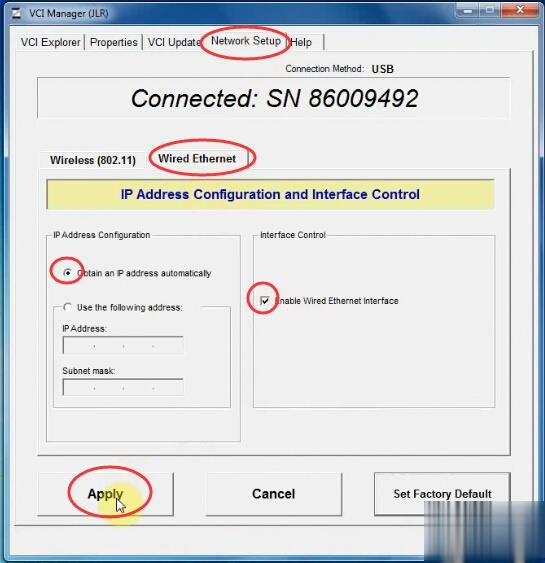
Choose Network Setup tab->Wired Etherent
How-to-Configure-WiFi-and-USB-for-Original-JLR-DoIP-VCI-4 (2)
Tick Enable Wired Etherent Interface

How-to-Configure-WiFi-and-USB-for-Original-JLR-DoIP-VCI-5 (2)

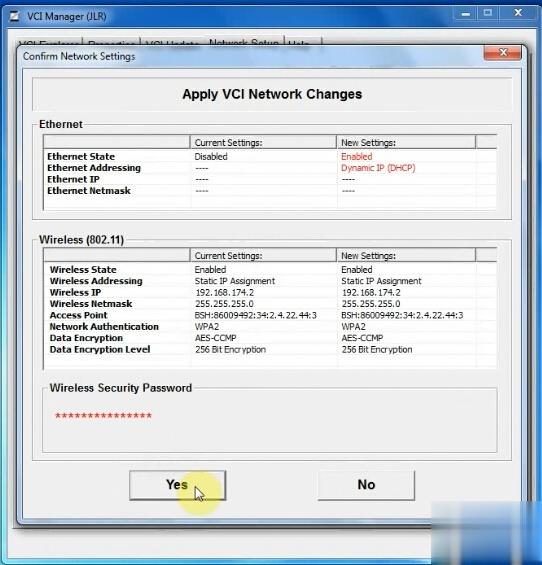
Press Apply button and Yes

How-to-Configure-WiFi-and-USB-for-Original-JLR-DoIP-VCI-6 (2)

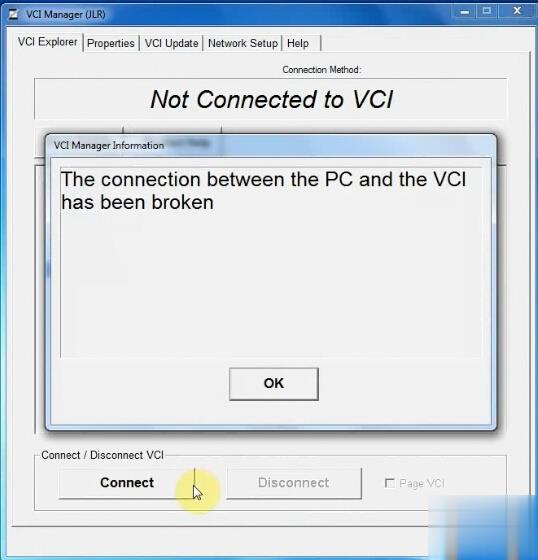
Then disconnect USB connection

Close VCI Manager

Open VCI Manager again

Press Connect

Go to Network Setup->Wired Etherent

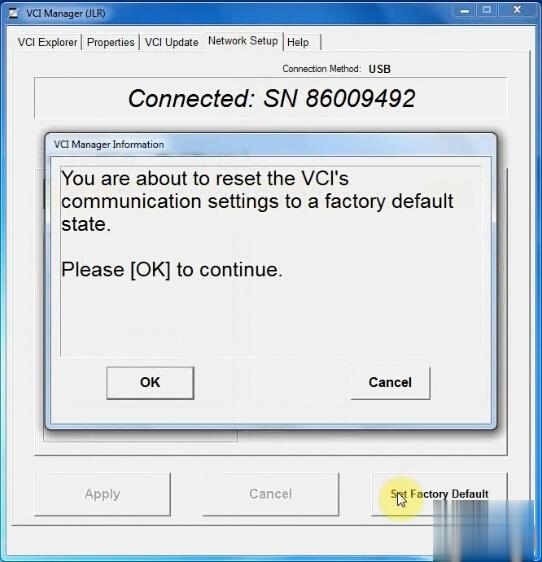
Press Set Factory Default

How-to-Configure-WiFi-and-USB-for-Original-JLR-DoIP-VCI-7 (2)

Press OK if system prompts you are about to reset the VCI communication settings to a factory default state.

How-to-Configure-WiFi-and-USB-for-Original-JLR-DoIP-VCI-8 (2)

Enable network connection

Press Set Factory Default again

How-to-Configure-WiFi-and-USB-for-Original-JLR-DoIP-VCI-9 (2)

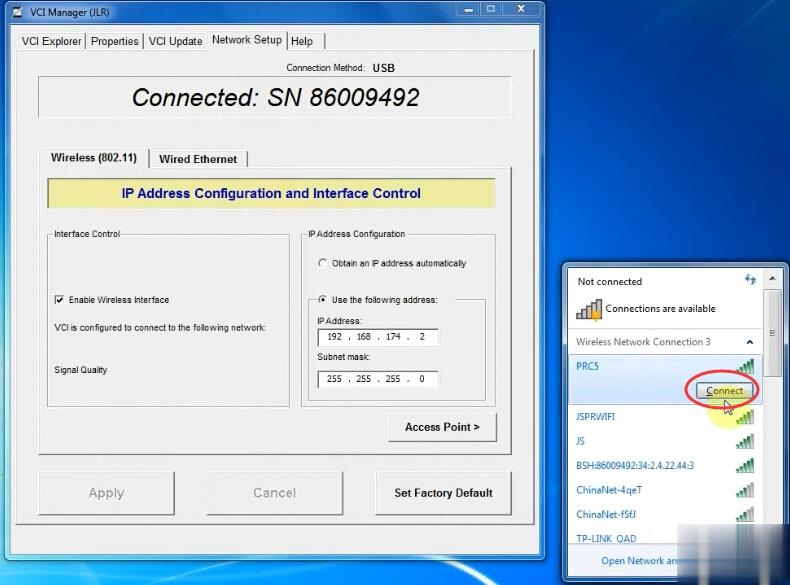
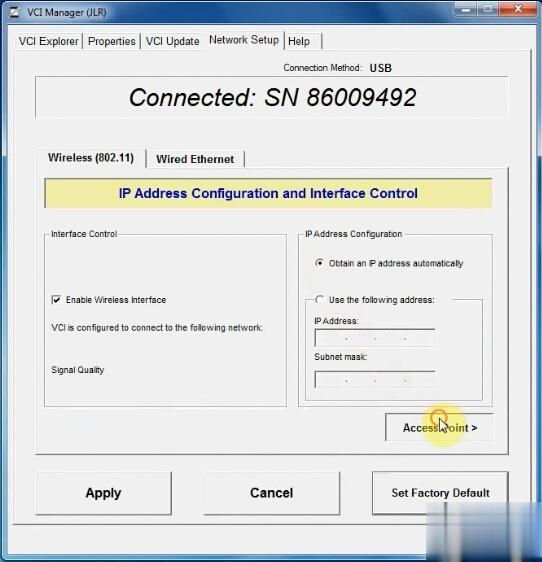
In Wireless (802.11), choose Obtain an IP address automatically, then press Access Point

How-to-Configure-WiFi-and-USB-for-Original-JLR-DoIP-VCI-10 (2)

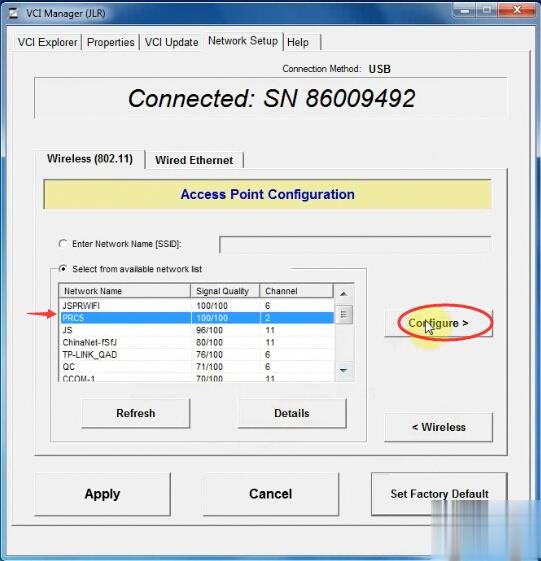
Choose Wireless resource which is the same as the your network
Press Configure

How-to-Configure-WiFi-and-USB-for-Original-JLR-DoIP-VCI-11 (2)

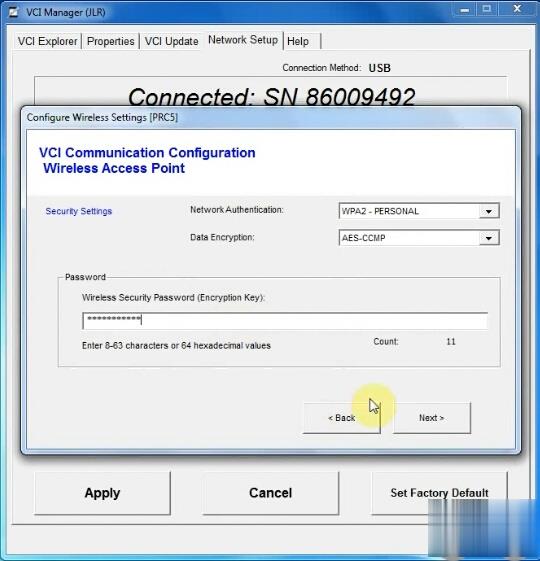
Enter wireless security password (encryption key)

Press Next

How-to-Configure-WiFi-and-USB-for-Original-JLR-DoIP-VCI-12 (2)

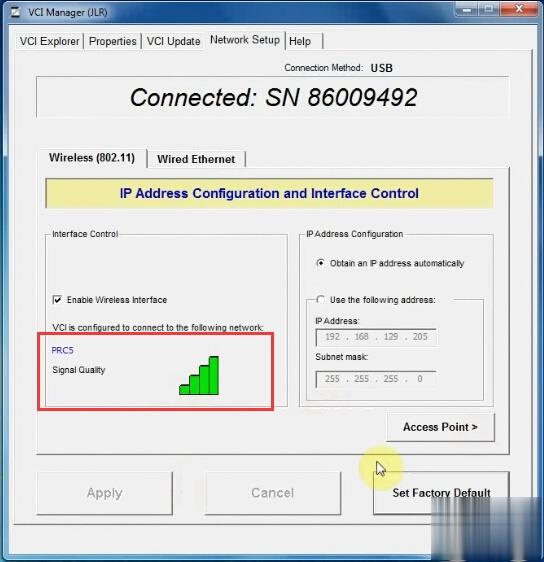
JLR VCI is configured to connect to your network

Disconnect and then Connect VCI

How-to-Configure-WiFi-and-USB-for-Original-JLR-DoIP-VCI-13 (2)

It shows WiFi connection is done

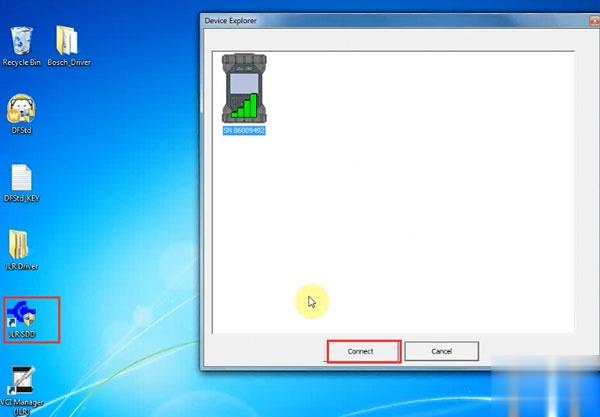
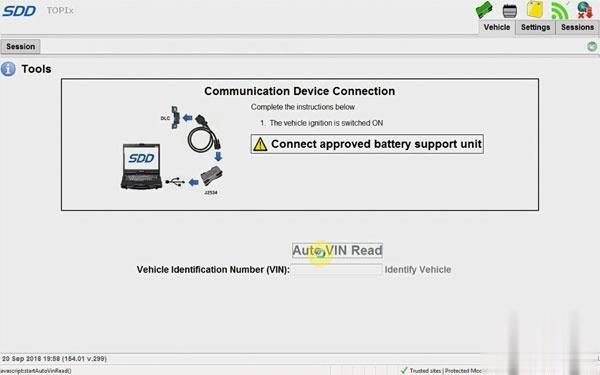
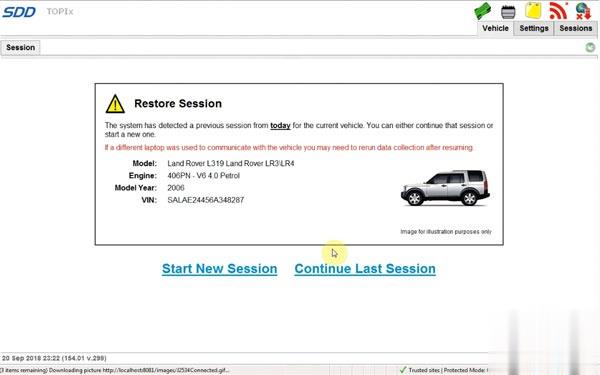
Open JLR SDD software on desktop

How-to-Configure-WiFi-and-USB-for-Original-JLR-DoIP-VCI-14 (2)

Press Connect

How-to-Configure-WiFi-and-USB-for-Original-JLR-DoIP-VCI-15 (2)
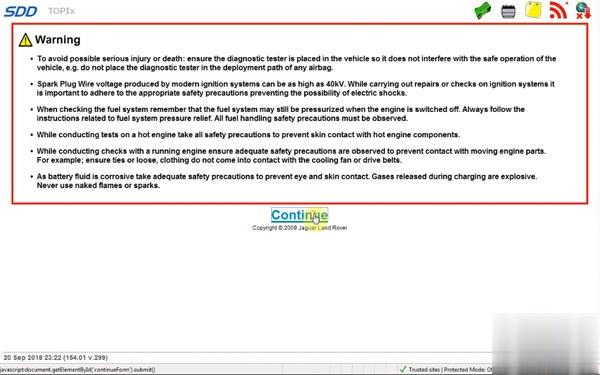
Now you can run SDD software for diagnosis
How-to-Configure-WiFi-and-USB-for-Original-JLR-DoIP-VCI-16 (2)

How-to-Configure-WiFi-and-USB-for-Original-JLR-DoIP-VCI-17 (2)
Part 2: How to connect JLR DoIP VCI via USB

To setup USB connection, you need to download Bosch driver for VCI first:

https://mega.nz/#!aqwnhbQS!KS7QhERmZ4cCcZfvT2iXkdYN6ynz9vDQ3DmPQRGm0TU

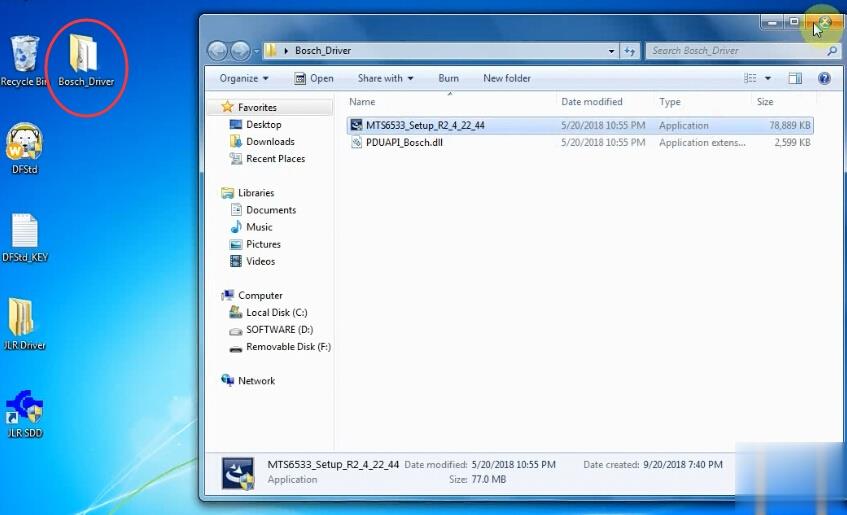
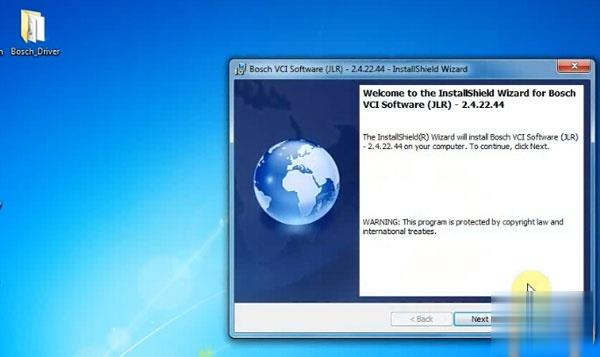
Open Bosch_Driver folder
How-to-Configure-WiFi-and-USB-for-Original-JLR-DoIP-VCI-18 (2)
Open MTS6533_Setup

How-to-Configure-WiFi-and-USB-for-Original-JLR-DoIP-VCI-19 (2)
Install Bosch VCI Software (JLR)
Press Next
Press Next
Press Install
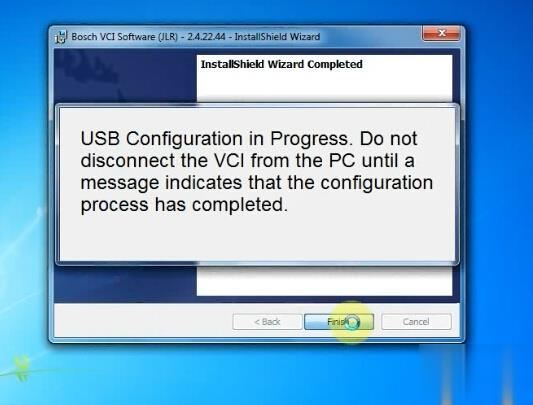
Finish installing Bosch VCI software
How-to-Configure-WiFi-and-USB-for-Original-JLR-DoIP-VCI-20 (2)
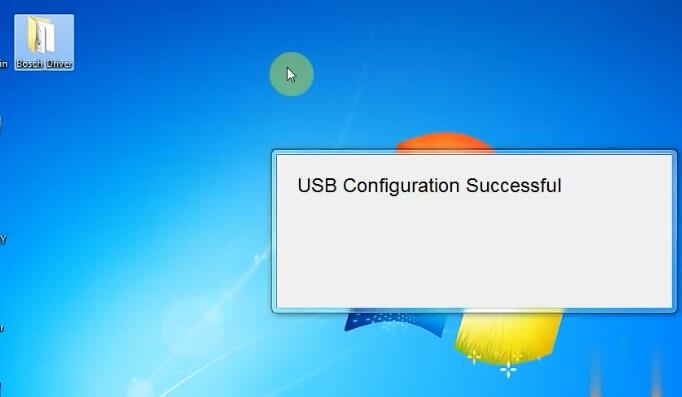
USB Configuration in progress. Don’t disconnect JLR VCI from PC until a message indicates that the configuration process has completed.

How-to-Configure-WiFi-and-USB-for-Original-JLR-DoIP-VCI-21 (2)

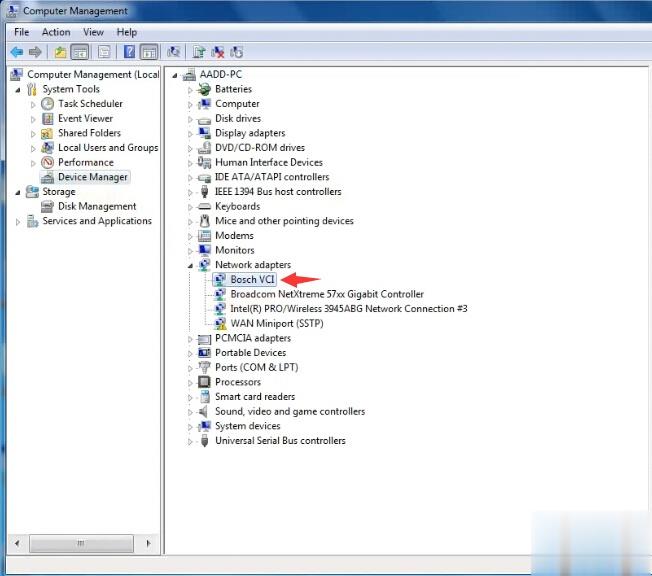
Open Device Manager to check the Bosch JLR DoIP VCI adapter is well connected

How-to-Configure-WiFi-and-USB-for-Original-JLR-DoIP-VCI-22 (2)

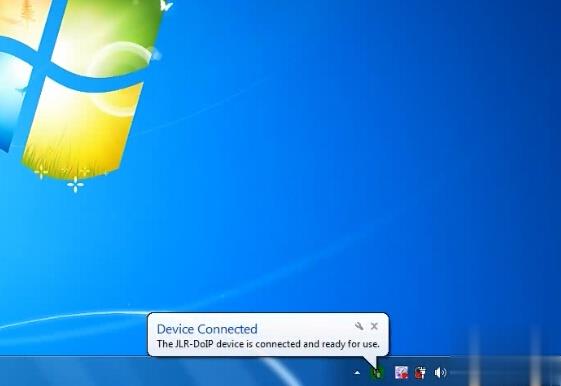
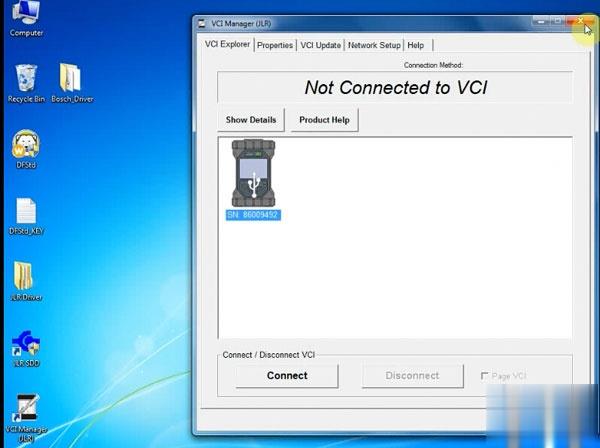
Open VCI Manager on desktop to make sure the Manager detect JLR VCI which indicates interface is well connected

How-to-Configure-WiFi-and-USB-for-Original-JLR-DoIP-VCI-23 (2)

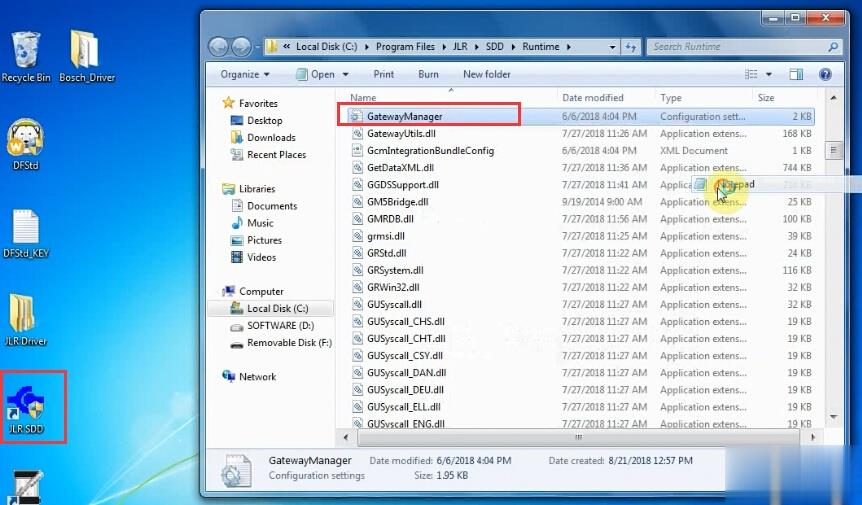
Right click JLR SDD software on desktop->Find File location C:/Program Files/JLR/SDD/Runtime

How-to-Configure-WiFi-and-USB-for-Original-JLR-DoIP-VCI-24 (2)

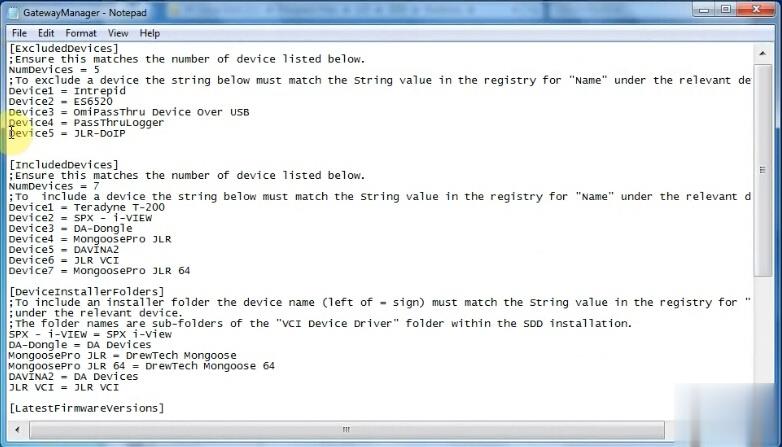
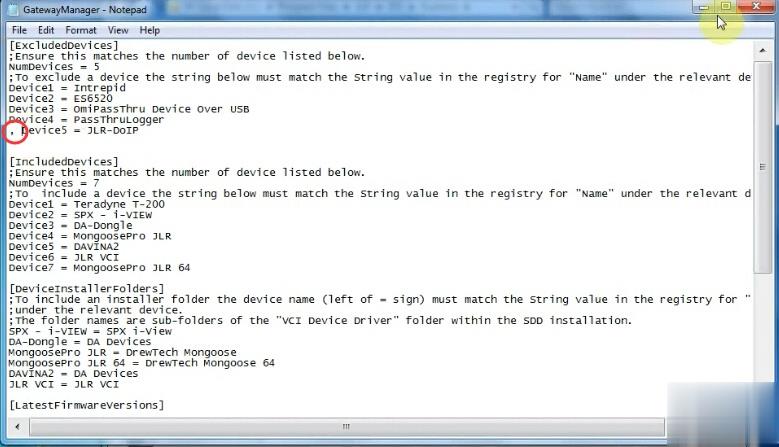
Open the GatewayManager with Notepad
Find “Device5 = JLR-DOIP” and change value to “,  Device5 = JLR-DOIP”

How-to-Configure-WiFi-and-USB-for-Original-JLR-DoIP-VCI-25 (2)

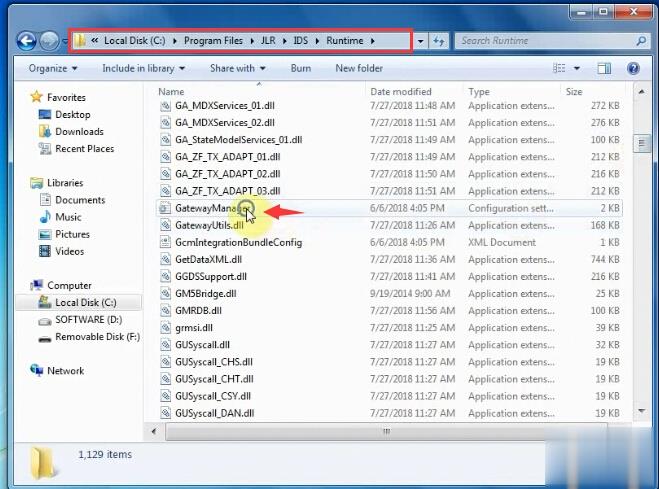
Find Go to C:/Program Files/JLR/IDS/Runtime
How-to-Configure-WiFi-and-USB-for-Original-JLR-DoIP-VCI-26 (2)
Open the GatewayManager with Notepad
Find “Device5 = JLR-DOIP” and change value to “,  Device5 = JLR-DOIP”

How-to-Configure-WiFi-and-USB-for-Original-JLR-DoIP-VCI-27 (2)

Setup completed.

Now you can run JLR SDD and Pathfinder software

How-to-Configure-WiFi-and-USB-for-Original-JLR-DoIP-VCI-28 (2)