Search site

Contact

Car diagnostic tools information by obd2tool

https://www.obd2tool.com

Welcome to my blog,here some auto diagnostic tools will be displayed. If you want to know more information,you can visit our official website: www.obd2tool.com.

lovelily750@gmail.com

News

Visitors notice

12/01/2014 07:47
Let your visitors know about news and events on your website as often as possible. You need to keep your website up-to-date so that your visitors will get used to visiting your pages regularly. You can use RSS feeds to deliver new articles directly to your readers.

Website launched

12/01/2014 07:46
Our new website has been launched today. Tell your visitors why you have started a new presentation and how it benefits them. Mention your goals and project advantages. Try to briefly give your visitors reasons why they should return to your pages.

The blog of OBD2 TOOL

How Launch X431 V+ X431 PRO3 wins maxgo, snap on scanners, OTC

09/12/2020 11:05
Got this Launch X431 V+ package days ago and it is in a good condition, all OBD stuff and the device packed in a protective case. Device is made well and multi-function with a legible touch screen. X431 pro3 wins snap on scanners, OTC and maxgo: I come from a family of mechanics I personally...

FIAT Viaggio 2012 Seatbelt ReminderAlert Activation by Launch X431

08/25/2020 18:05
This instruction show you guide how to use Launch X431 to activate seatbelt reminder for FIAT Viaggio. Before running the car, the vehicle opens a seatbelt alerting function for passengers, ensure the car safety.For more Fiat repair,please check here:FIAT Trouble Repair What You Need? Launch...

How to do Actuation Test by Launch Thinkcar Thinkdiag

08/25/2020 17:57
Step by step to use Launch Thinkcar Thinkdiag to do Actuation Test. 1. Plug Thinkdiag into the obd2 port of car, hear the beeps and see the green indicator light indicating that is connected. We have the engine on for the car. 2. Select “All systems full function” 3. Going to scan the vehicle’s...

Possible to use Digiprog 3 v4.94 for Porsche Cayman odometer correction

08/11/2020 10:12
Possible to use Digiprog 3 v4.94 for Porsche Cayman odometer correction? Yes. Here is the Cayman with chip types confirmed to work: Porsche Cayman 93C86 Porsche Cayman MCU 35P08 Porsche Cayman 2010 95640 Porsche Cayenne Diag In detail… Porsche Cayman 93C86 Note Tacho Meter Value Dismantle...

Digiprog 3 Chrysler/Jeep/Dodge Odometer Correction Car List and Wiring

08/11/2020 10:04
Digiprog3 v4.94 odometer correction tool possibilities on Chrysler, Jeep and Dodge: Chrysler odometer correction using Digiprog 3: Chrysler (Plymouth) Prowler Chrysler 300 HC12 Programming Via Micro Chrysler 300M Chrysler 300c Chrysler 300c HC12 Chrysler All Models Chrysler All...

ODIS SOFTWARE DOWNLOAD

06/15/2020 21:06
Here I list the download link of the ODIS software. There are a few statements below. 1: Some software has not been tested, the security cannot be guaranteed, obd2tool blog does not take any responsibility, please know. 2: These links are searched on Google, www.obd2tool.com is only...

ORANGE5 PLUS V1.35 VS. ORANGE5 V1.34

06/15/2020 21:03
New OEM Orange 5 Plus clone has been released at cardiagtool.co.uk. It comes with software v1.35 and adds more functions than Orange 5. Check what’s new of this Auto ECU Programmer and learn the installation guide.   Orange 5 Plus vs. Orange 5 Clone:   Orange 5 Plus Orange...

Newest 2020.05 Version BMW ICOM NEXT A +B + C,ICOM A2,A3+B+C Software Released

06/02/2020 12:08
V2020.05 Newest Version Software ISTA-D ISTA 4.22.32 ISTA-P 3.67.1.006 with Engineer Programming   It works on BMW ICOM NEXT,BMW ICOM A2+B+C,BMW ICOM A3+B+C+D.   Software Version : V2020.05 ISTA – D: 4.22.32,with SDP Programming Database 4.22.32 ISTA – P: 3.67.1.006 with Engineer...

2014 Toyota“Fault Code”C1515 “Torque sensor zero adjustment is not complete” Operation method

06/02/2020 12:01
Test car model: Function Instruction: EMPSECU、Steering wheel、Tilt the steering column.、The steering column gear assembly and so on, if replaced, the direction does not help. Instrument PS warning Light, X – 431 reads to the fault code C1515 – torque sensor zero adjustment unfinished – current –...

How to fix 2007 vauxhall corsa no comms with GM MDI2 tech2 win

05/05/2020 18:11
Tool to use: GM MDI2 diagnostic tool Symptom: Got mdi2 to connect to the gm mdi manager, but it will not communicate with a car. using opel with Tech 2 win on the mdi2 box the tick and car lights light up for a second then go off and the pc light flashes. when i open tech2win it asks me to...
<< 4 | 5 | 6 | 7 | 8 >>

Injection Actuation Pressure Test using Caterpillar ET Software

02/06/2023 14:49

Injection Actuation Pressure Test

#Purpose
The Injection Actuation Pressure Test function checks for leaks on all hydraulic components. This test allows the user to change the desired pressure and then view the actual pressure results.

#Accessing
To run the Injection Actuation Pressure Test function:
1). Connect CAT Caterpillar ET to the Service Tool connector. Read More: How to Connecting Caterpillar ET Software to the ECM.

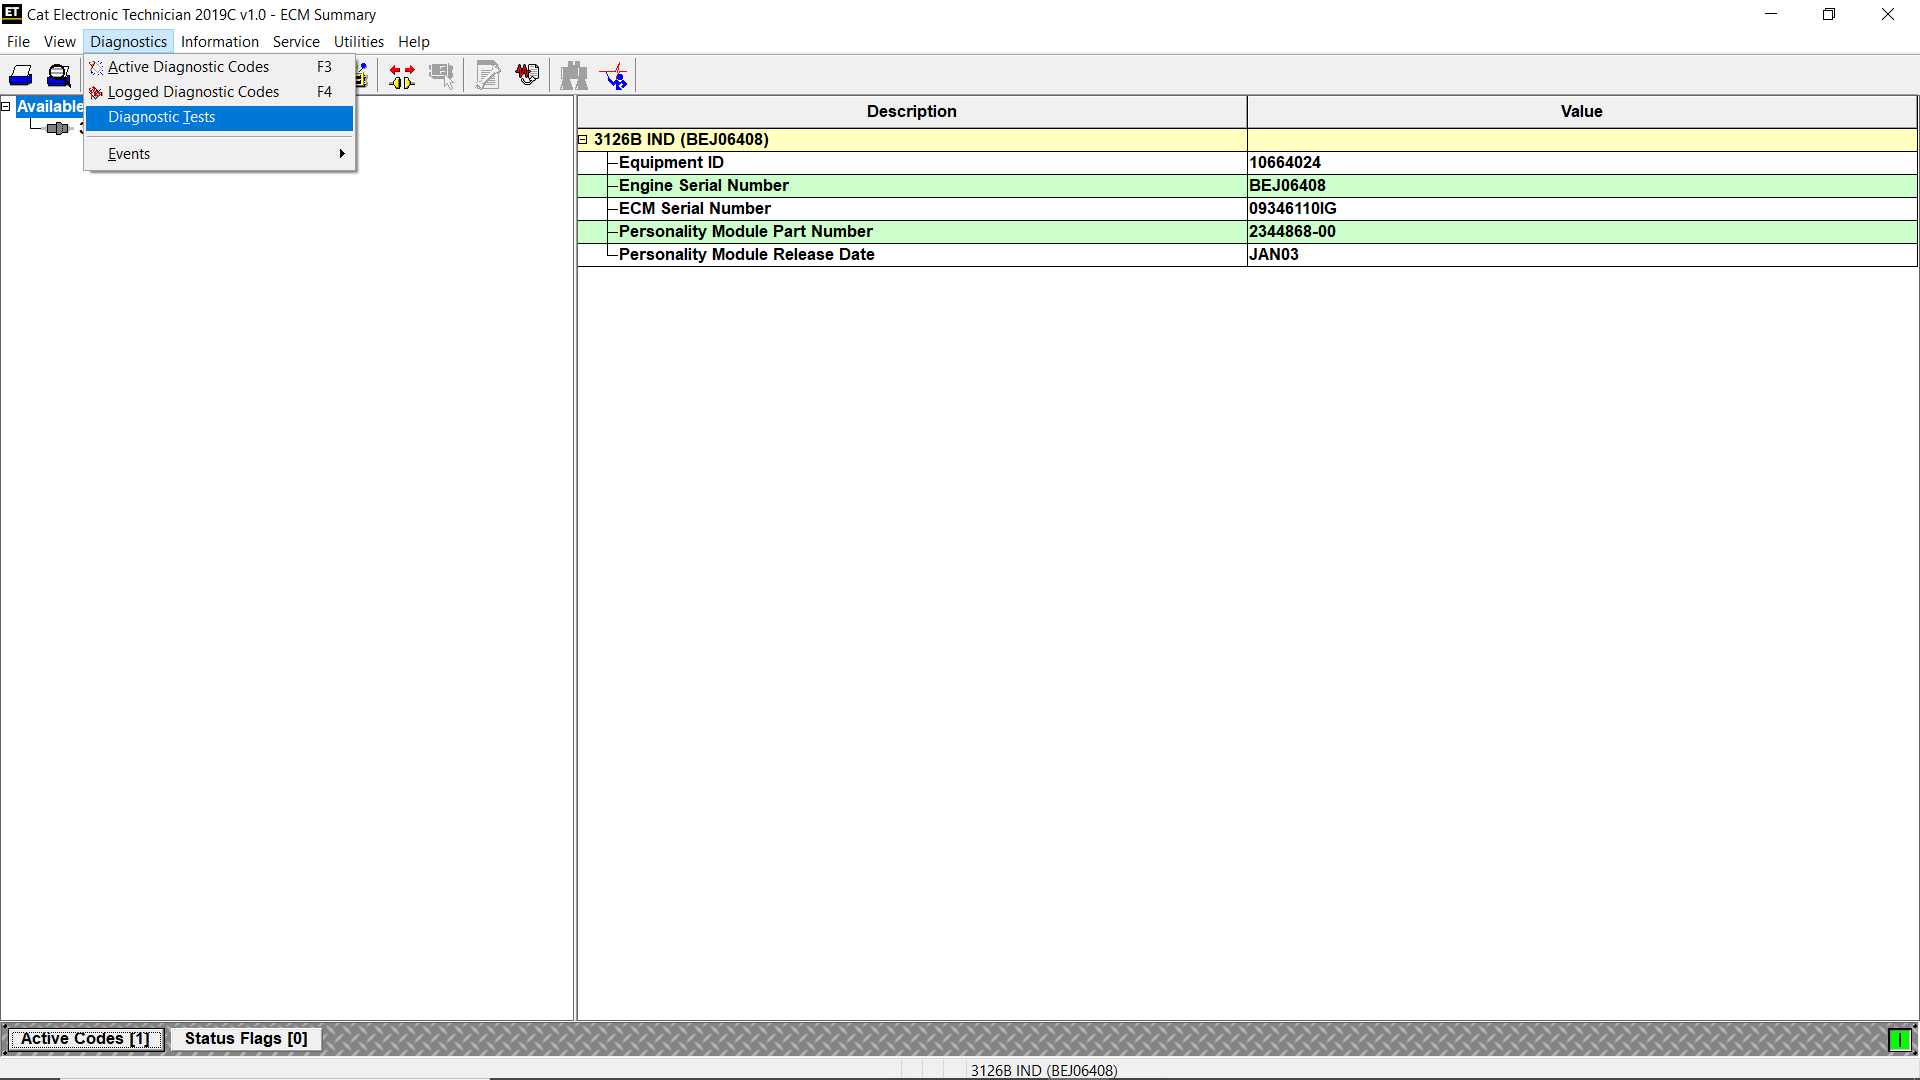
2). Select Diagnostic Tests from the Diagnostics menu.

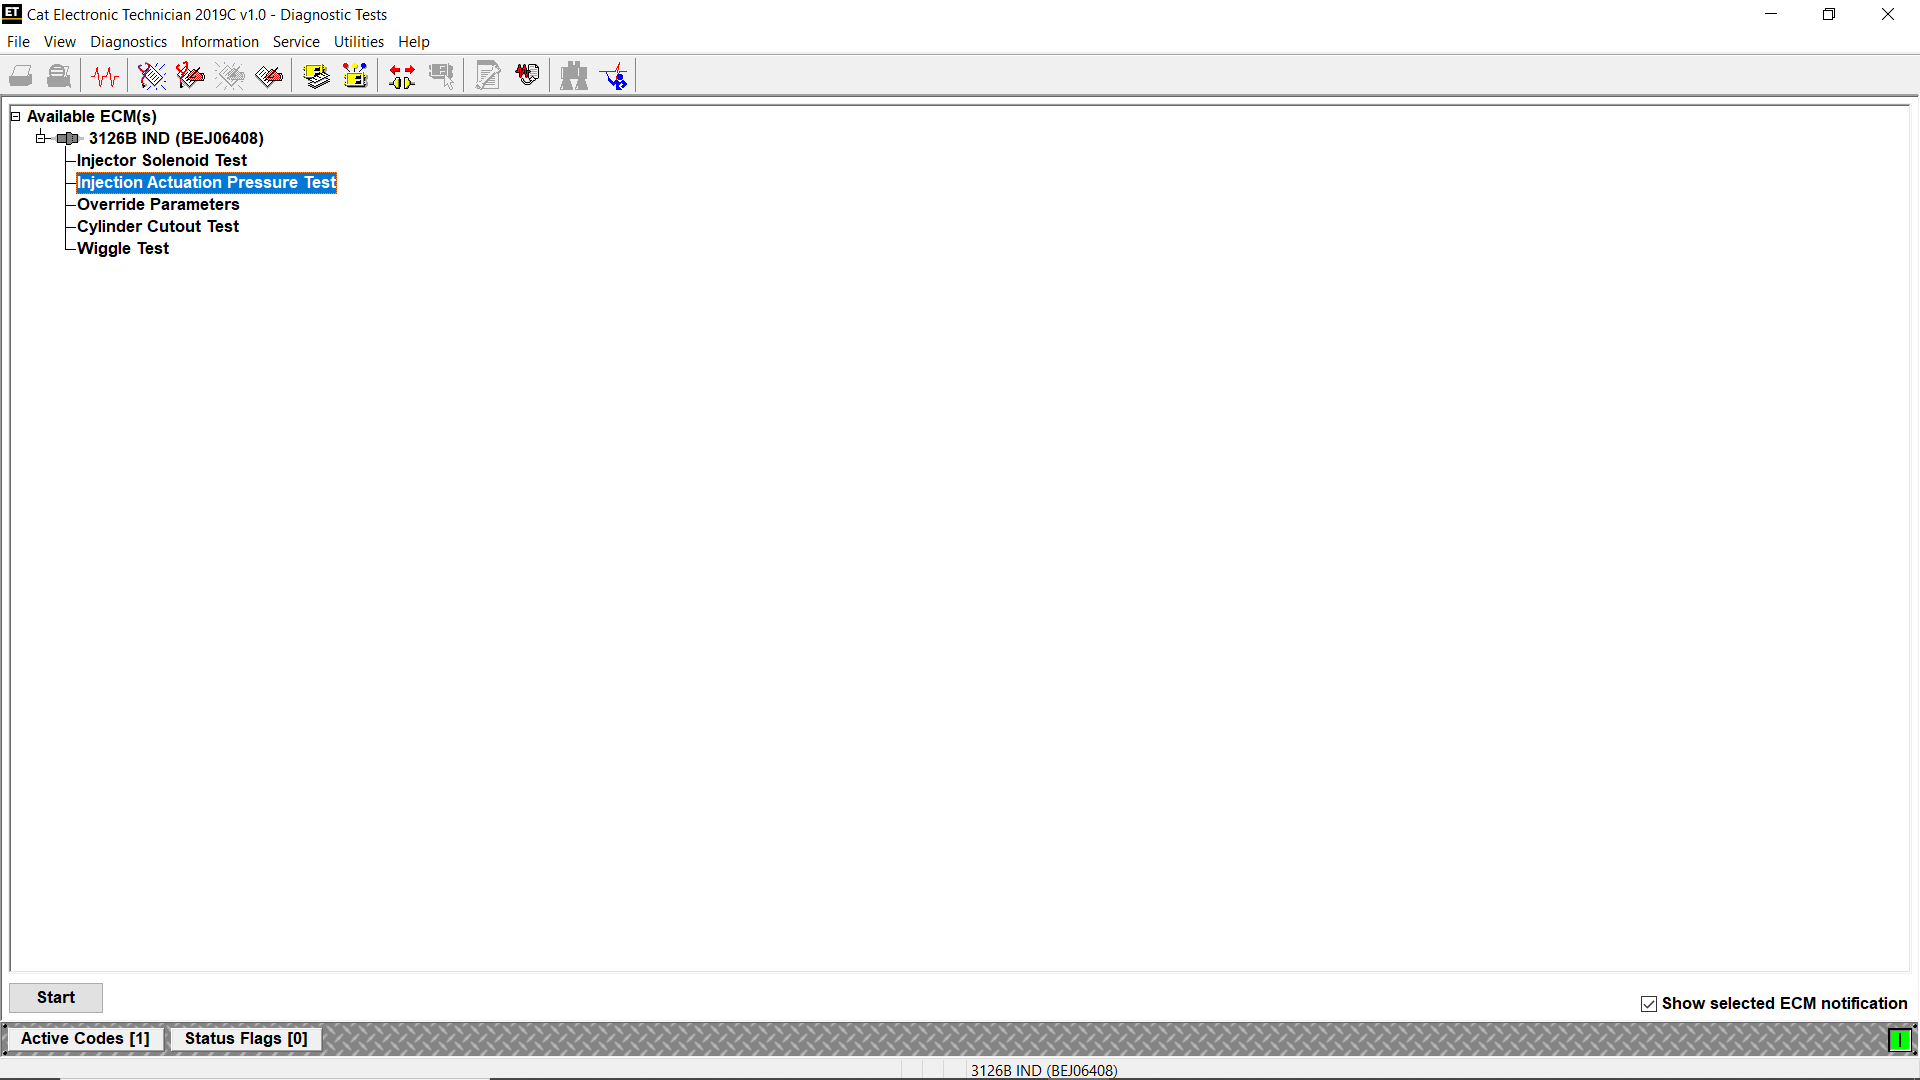
3). Select Injection Actuation Pressure Test from the submenu. Click Start.

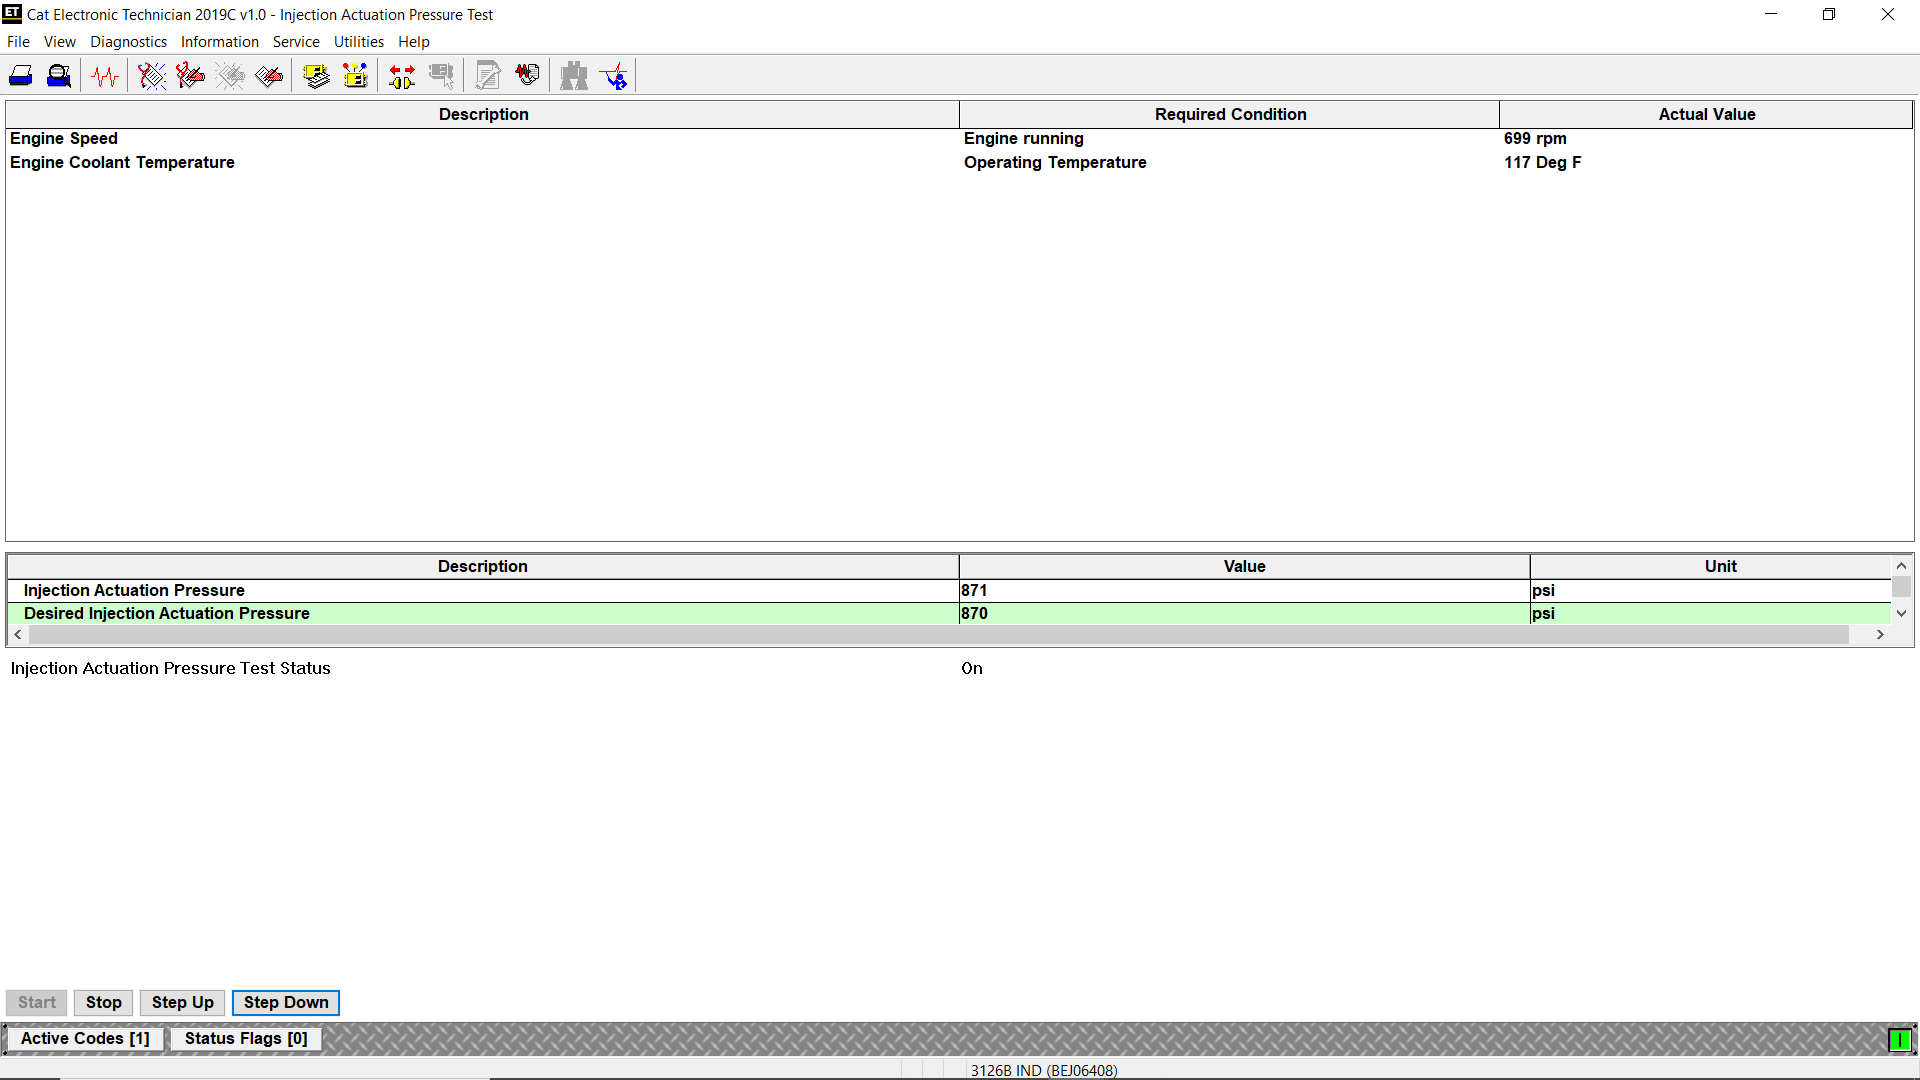
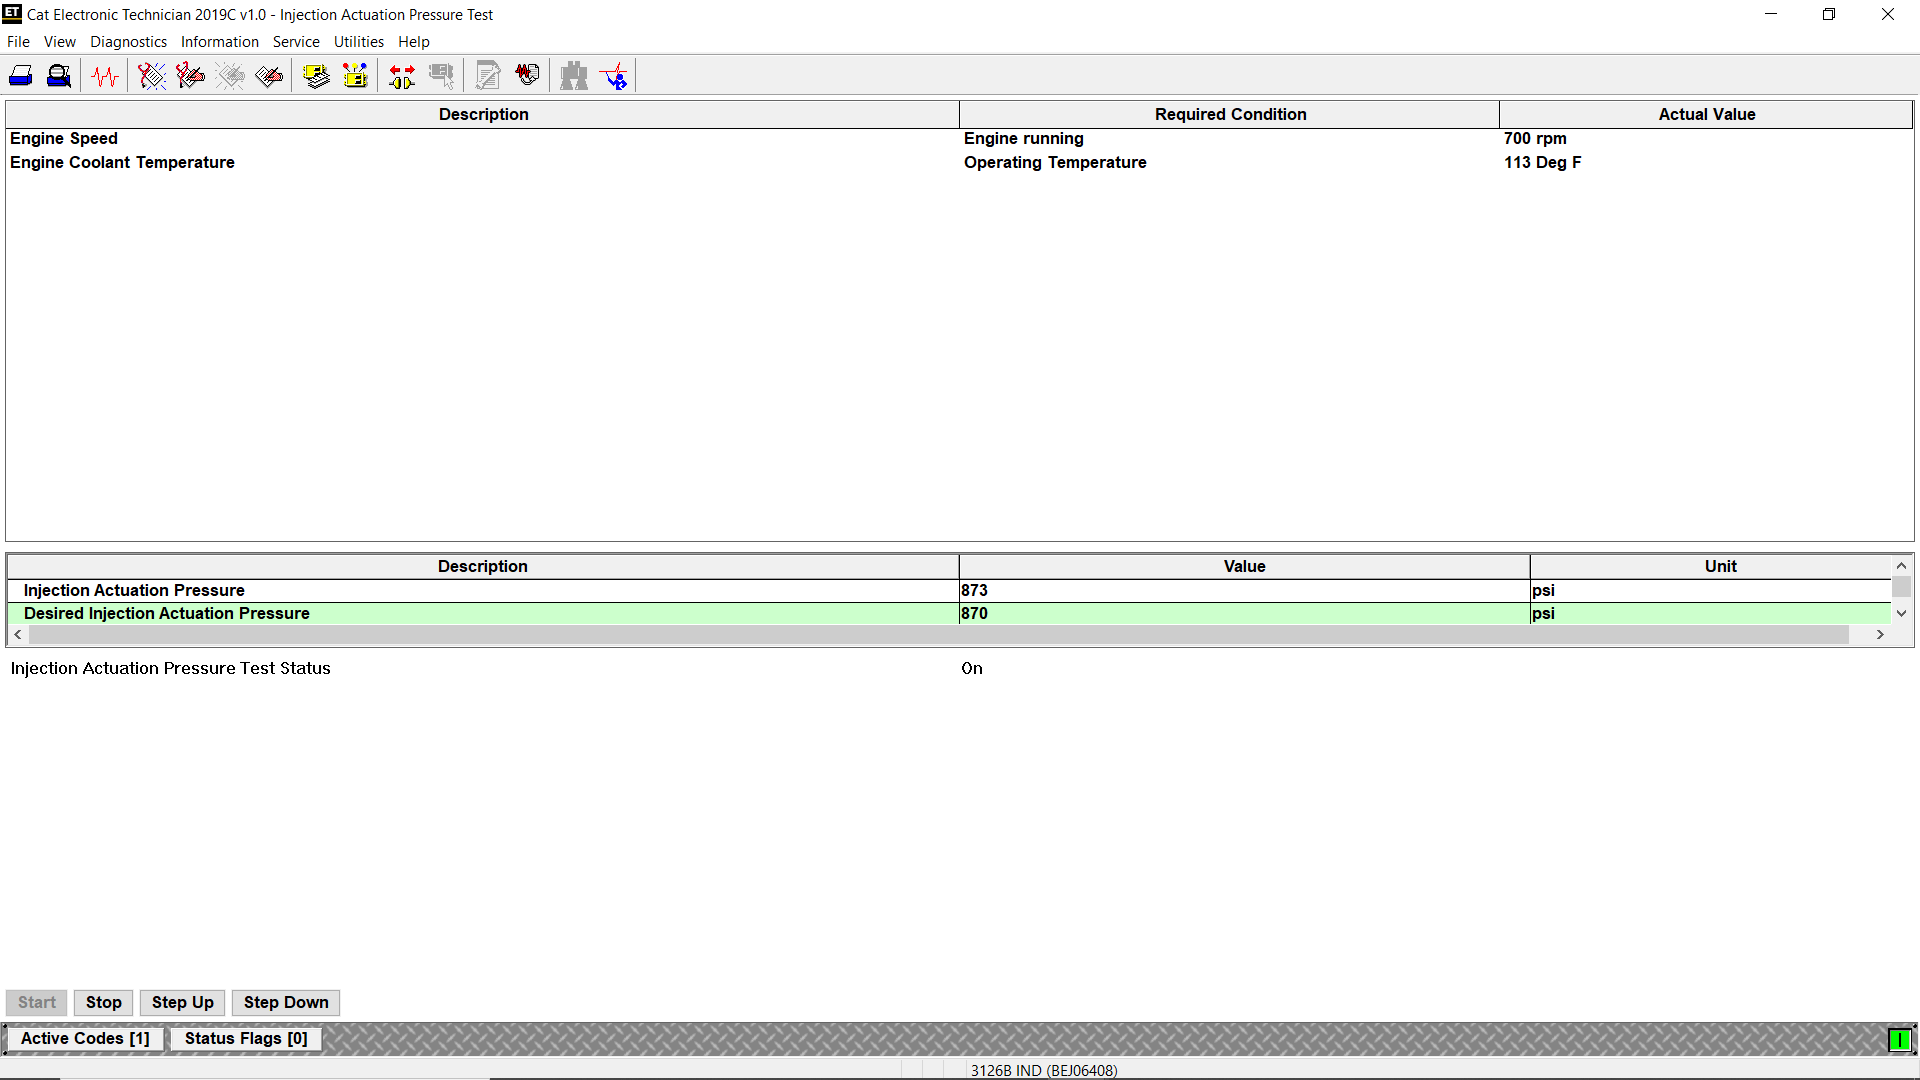
4). The Injection Actuation Pressure Test screen is displayed.

#Screen Layout
The Injection Actuation Pressure Test screen has the following areas:
A. Display Area
The Injection Actuation Pressure Test setup condition area has three columns:
* Description – Provides the name of the parameter set to run the test
* Required Condition – Displays the value that the parameter must meet in order to run the test
* Actual Value – Displays the actual value of the parameter listed in the Required Condition column

B. Status Parameter
The Injection Actuation Pressure Test status parameter area lists parameters and their current values and units of measure. The parameters listed in this area are dependent on the product being tested.

C. Status Line
Test status line indicates whether the test is “On” or “Off”.

D. Buttons
The Buttons available in the Injection Actuation Pressure Test screen are:

* Start – Click this button to begin the Injection Actuation Pressure Test
* Stop – Click this button to stop testing
* Step Up – Click this button to increase the desired pressure of the system. Note: This button is disabled once the pressure value is at its maximum. It may or may not be available based on the current ECM.

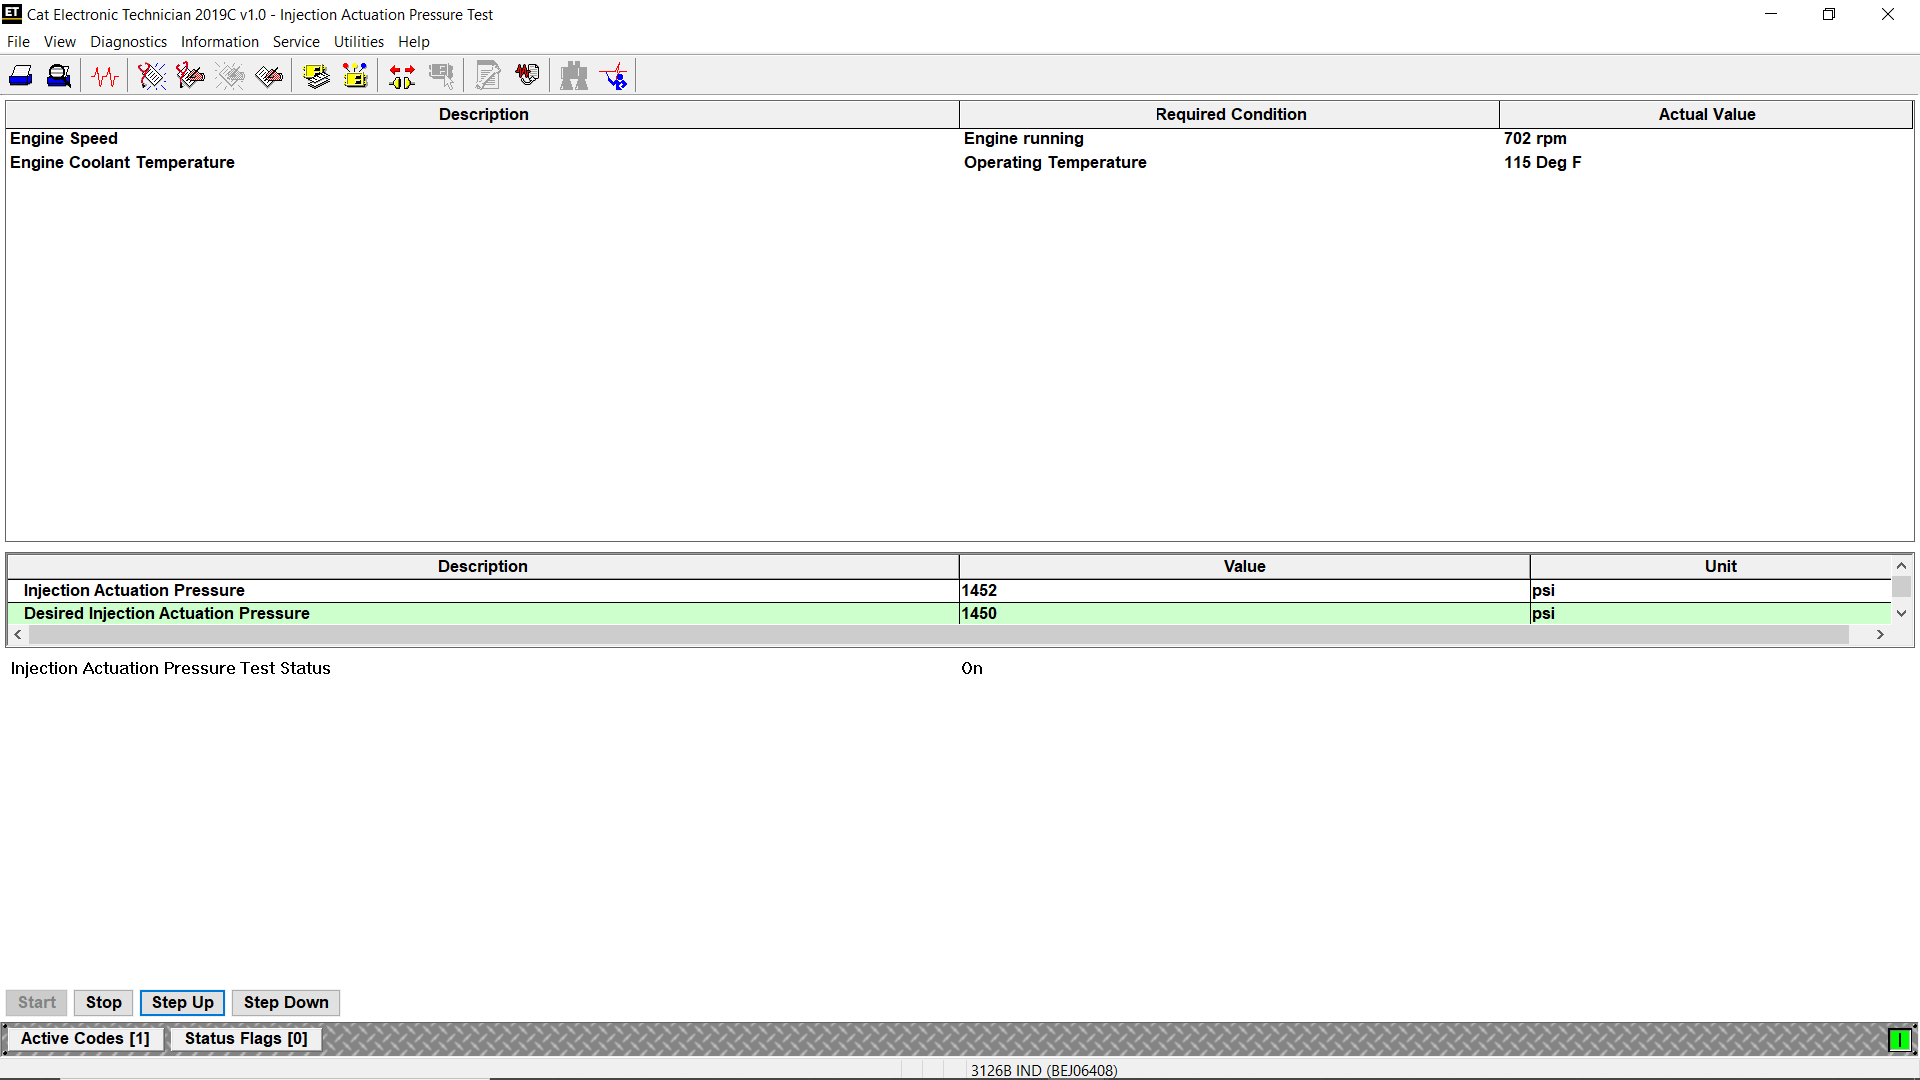
* Step Down – Click this button to decrease the desired pressure of the system. Note: This button is disabled once the pressure value is at its minimum. It may or may not be available based on the current ECM.