Search site

Contact

Car diagnostic tools information by obd2tool

https://www.obd2tool.com

Welcome to my blog,here some auto diagnostic tools will be displayed. If you want to know more information,you can visit our official website: www.obd2tool.com.

lovelily750@gmail.com

News

Visitors notice

12/01/2014 07:47
Let your visitors know about news and events on your website as often as possible. You need to keep your website up-to-date so that your visitors will get used to visiting your pages regularly. You can use RSS feeds to deliver new articles directly to your readers.

Website launched

12/01/2014 07:46
Our new website has been launched today. Tell your visitors why you have started a new presentation and how it benefits them. Mention your goals and project advantages. Try to briefly give your visitors reasons why they should return to your pages.

The blog of OBD2 TOOL

JPRO Professional Truck Diagnostic Tool

07/31/2023 16:56
Efficient and Accurate Diagnostic Tool: A Look at Nexiq USB-Link, Cummins INLINE, New Holland Electronic Service Tools, JPRO Professional Truck Diagnostic, CAT ET 3, John Deere Service Advisor, and Volvo Vocom II   In the world of vehicle diagnostics, efficiency and accuracy are key....

PCMTuner ‘Unable to Use Selected Interface J2534

04/03/2023 13:23
Problem: “Unable to Use Selected Interface J2534 Scanmatik -SM2 USB” error occurs during the test of PCMtuner ECU Programmer. and the software is disconnected from the device. Solution: Uninstall the pcmtuner driver, and then reinstall it (the driver installation package can be obtained from...

How to Register and Activate New KT200 KTsuit Software

03/20/2023 12:04
Attention : The KT200 ECU Programmer requires an Internet connection. 1.Click the KTsuit Manager icon to enter user registration interface 2.Input your available email and click Submit 3.After registration, input the code (device SN) and click Activate to complete the software...

OTOFIX IM1 vs Autel IM508

03/09/2023 22:26
OTOFIX IM1 vs Autel IM508 Item Name Autel IM508 OTOFIX IM1 Remark Picture   Common Immo Key Programming Yes Yes, pay for advanced license   Basic Diagnostic Yes Yes, pay for advanced license Read DTC, clear DTC,...

How to use Launch X431 PAD V to do online coding of ECU long coding for Audi A5

02/17/2023 10:32
Here in this instruction,this article show you guide on how to use Launch X431 PAD V to do online coding of ECU long coding for Audi A5. For Audi repair,please check more cases here:Audi Trouble Repair Projects. Preparations: Launch X431 PAD V Procedures: Connect Launch X431 PAD V to...

Ford FDRS Supported Ford and Lincoln Vehicles by Model Year

02/08/2023 15:43
Problem: My vxdiag vcx nano Ford IDS V124 failed to communicate with a 2020 Ford Explorer. It says ‘use only Ford Diagnosis and Repair System (FDRS) for this vehicle.’ Any idea how to make it work? Solution: As the IDS says, you have to use FDRS on this vehicle. Ford Diagnostic &...

Injection Actuation Pressure Test using Caterpillar ET Software

02/06/2023 14:49
Injection Actuation Pressure Test #Purpose The Injection Actuation Pressure Test function checks for leaks on all hydraulic components. This test allows the user to change the desired pressure and then view the actual pressure results. #Accessing To run the Injection Actuation Pressure Test...

2023 Best Diagnostic Tools for Construction & Farming Diesel Equipment

01/30/2023 11:09
While aftermarket multi-brand tools are common for automotive and commercial trucks, they aren’t well known for diesel powered off-highway equipment. Off-highway equipment is anything powered by a diesel engine but not allowed to legally drive down the road. This includes farm tractors, excavators,...

How to Flash Programming with wiTECH 2

01/17/2023 18:57
Flash programming using wiTECH 2.0 software, connect the Micropod II interface to OBD II / DLC port in the car. wiTECH 2 will start to identify the vehicle based on VIN and the installed components in the vehicle network, which will bring up the network topology. In this document, we will explain...

Xtool tablets cluster mileage correction for VW Polo 2014

01/10/2023 12:53
Xtool tablets (Xtool D8, D9 Pro, A80/H6 Pro etc) are good at VAG MQB 2014- VDO cluster mileage correction. Here is an example of VW Polo 2014.6. Only continental and VDO clusters are supported. Original odometer: 231419km Select Special Function->Instrument...
1 | 2 | 3 | 4 | 5 >>

How to Configure WiFi and USB for Original JLR DoIP VCI

03/28/2021 17:08

Part 1: How to Configure WiFi for Original JLR DoIP VCI /setup wireless connection?

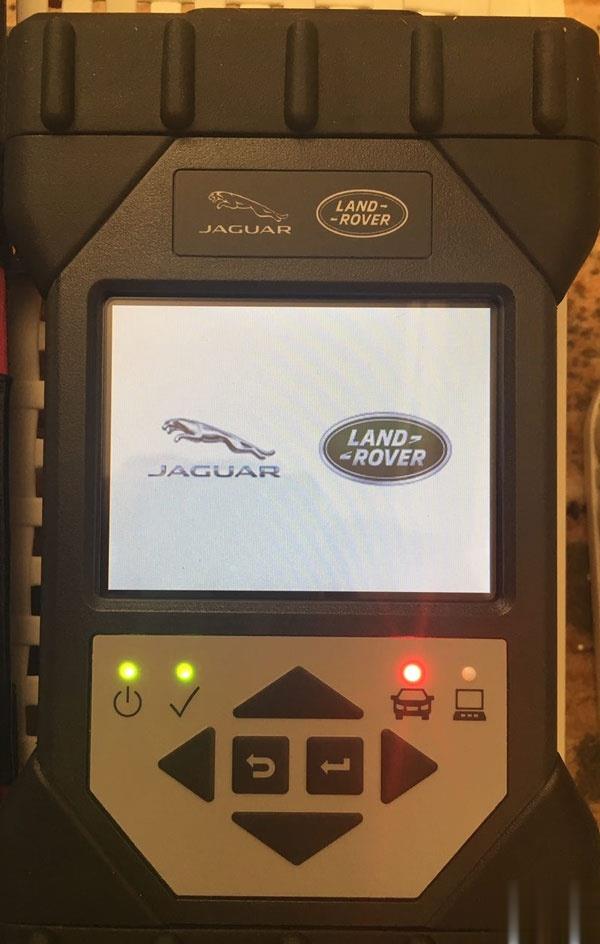
Original Jaguar Land Rover diagnostic tool JLR DoiP VCI supports both USB and WiFi connection. Here’s the guide to configure the LAN setting.

How-to-Configure-WiFi-and-USB-for-Original-JLR-DoIP-VCI-1 (2)

Procedure:

Connect JLR DoiP VCI W-F interface with vehicle

Connect the other end of VCI with laptop via USB cable

How-to-Configure-WiFi-and-USB-for-Original-JLR-DoIP-VCI-2 (2)

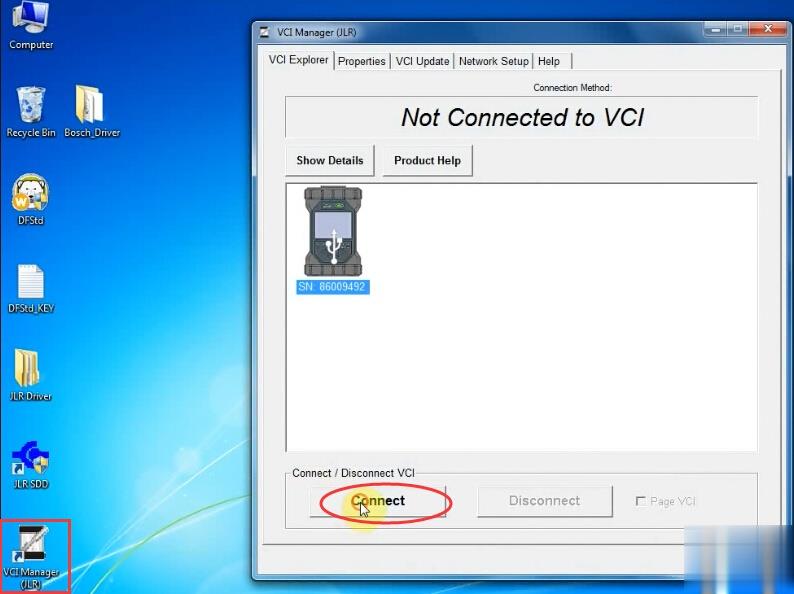
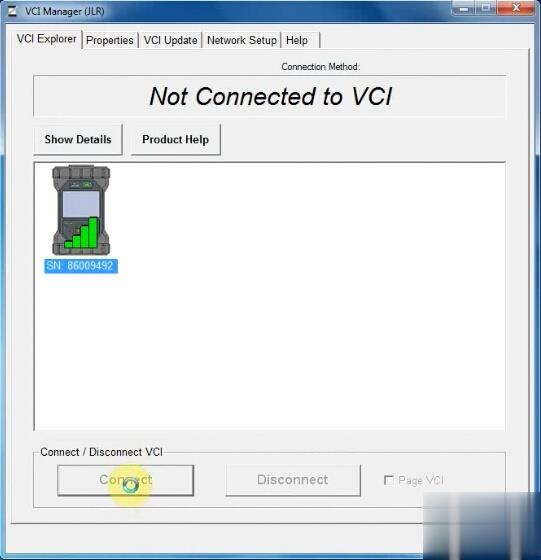
Open VCI Manager (JLR), press Connect

How-to-Configure-WiFi-and-USB-for-Original-JLR-DoIP-VCI-3 (2)

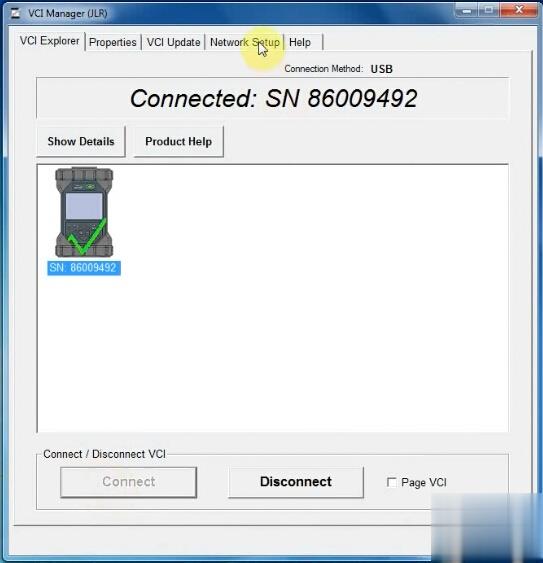
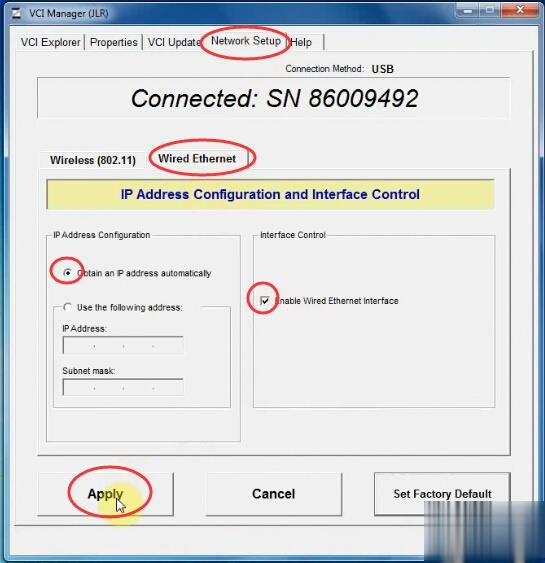
Choose Network Setup tab->Wired Etherent
How-to-Configure-WiFi-and-USB-for-Original-JLR-DoIP-VCI-4 (2)
Tick Enable Wired Etherent Interface

How-to-Configure-WiFi-and-USB-for-Original-JLR-DoIP-VCI-5 (2)

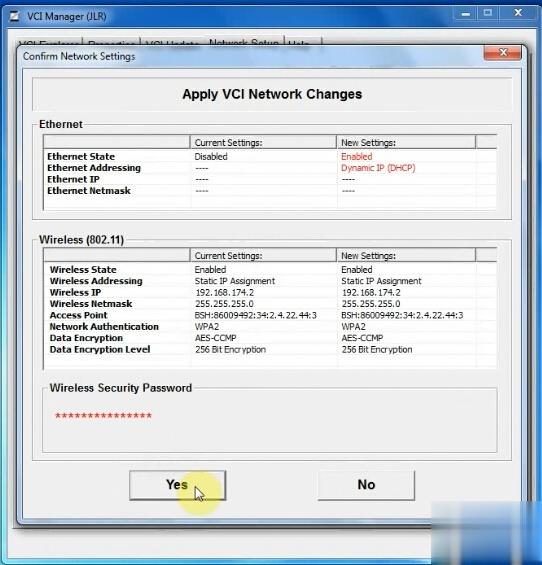
Press Apply button and Yes

How-to-Configure-WiFi-and-USB-for-Original-JLR-DoIP-VCI-6 (2)

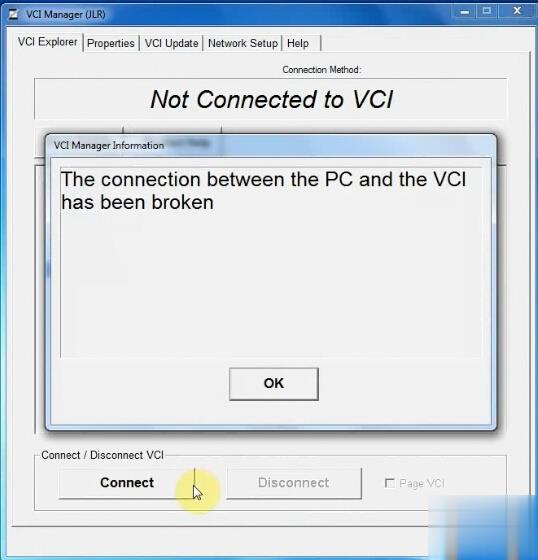
Then disconnect USB connection

Close VCI Manager

Open VCI Manager again

Press Connect

Go to Network Setup->Wired Etherent

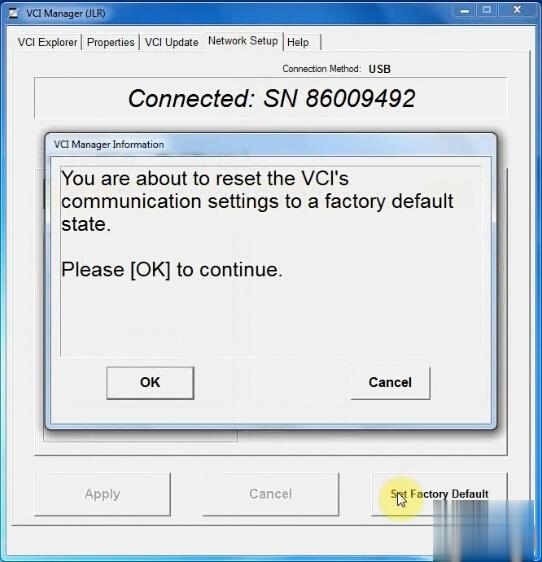
Press Set Factory Default

How-to-Configure-WiFi-and-USB-for-Original-JLR-DoIP-VCI-7 (2)

Press OK if system prompts you are about to reset the VCI communication settings to a factory default state.

How-to-Configure-WiFi-and-USB-for-Original-JLR-DoIP-VCI-8 (2)

Enable network connection

Press Set Factory Default again

How-to-Configure-WiFi-and-USB-for-Original-JLR-DoIP-VCI-9 (2)

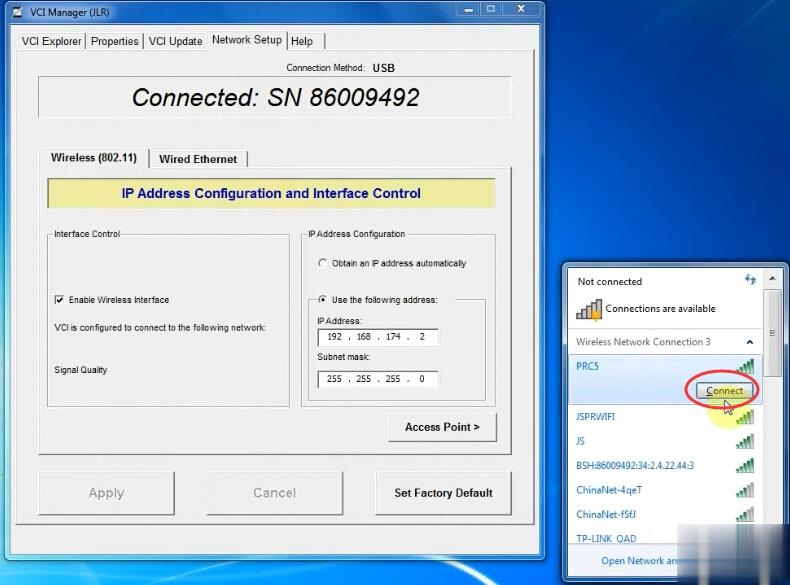
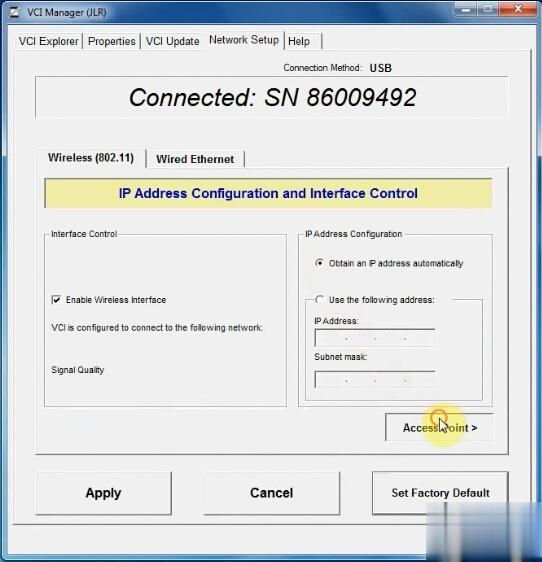
In Wireless (802.11), choose Obtain an IP address automatically, then press Access Point

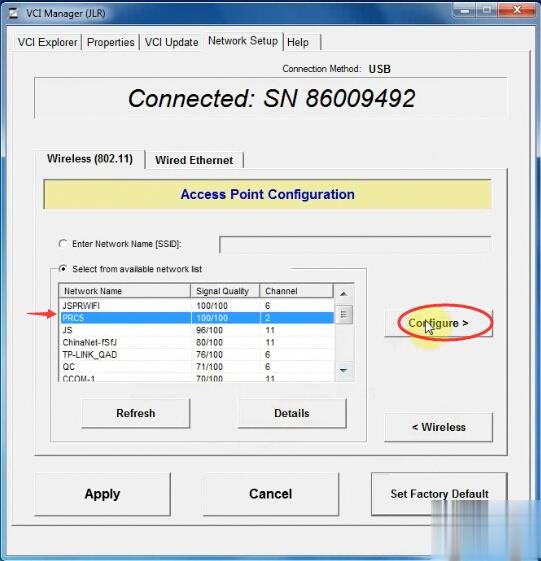
How-to-Configure-WiFi-and-USB-for-Original-JLR-DoIP-VCI-10 (2)

Choose Wireless resource which is the same as the your network
Press Configure

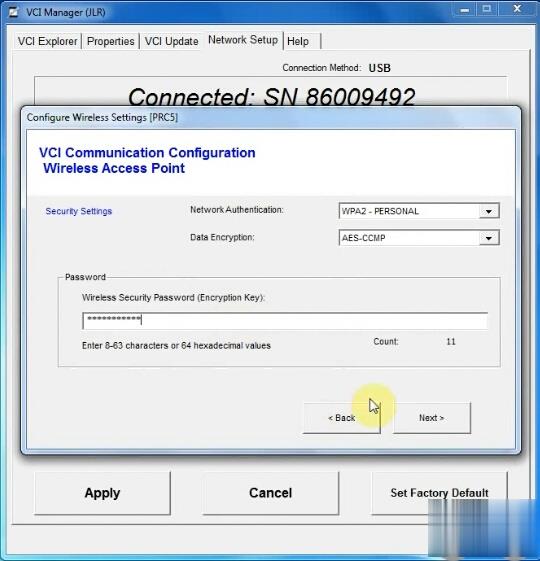
How-to-Configure-WiFi-and-USB-for-Original-JLR-DoIP-VCI-11 (2)

Enter wireless security password (encryption key)

Press Next

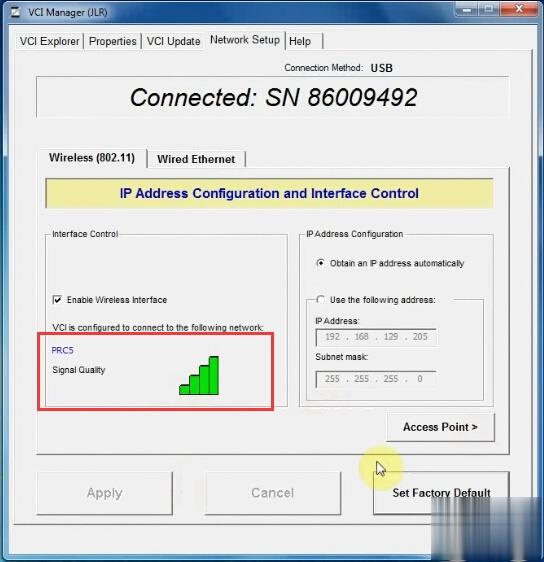
How-to-Configure-WiFi-and-USB-for-Original-JLR-DoIP-VCI-12 (2)

JLR VCI is configured to connect to your network

Disconnect and then Connect VCI

How-to-Configure-WiFi-and-USB-for-Original-JLR-DoIP-VCI-13 (2)

It shows WiFi connection is done

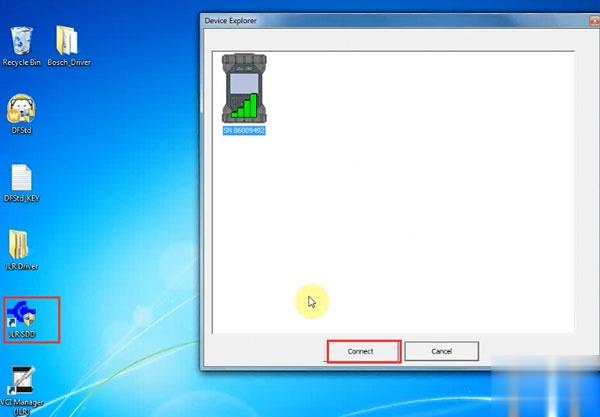
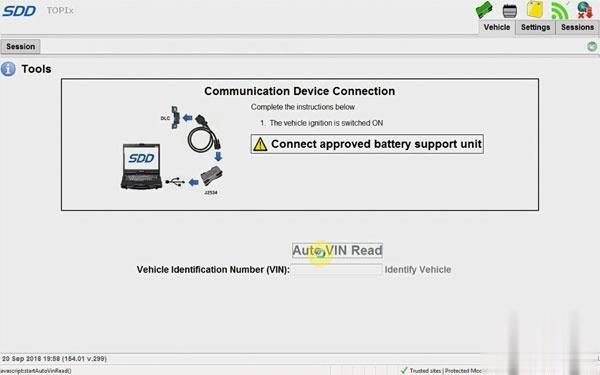
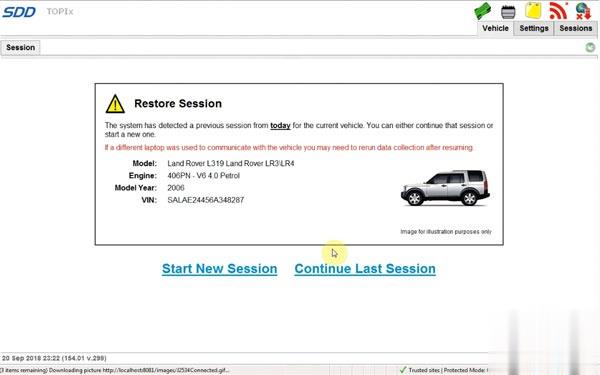
Open JLR SDD software on desktop

How-to-Configure-WiFi-and-USB-for-Original-JLR-DoIP-VCI-14 (2)

Press Connect

How-to-Configure-WiFi-and-USB-for-Original-JLR-DoIP-VCI-15 (2)
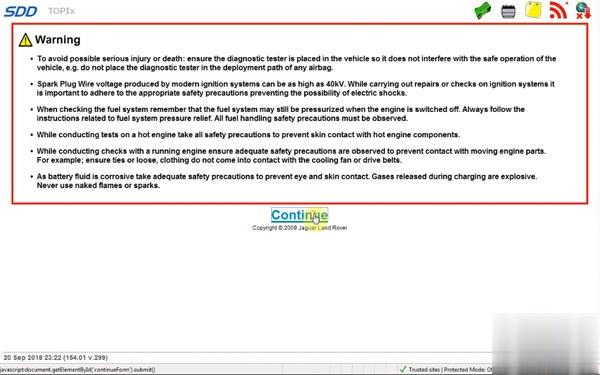
Now you can run SDD software for diagnosis
How-to-Configure-WiFi-and-USB-for-Original-JLR-DoIP-VCI-16 (2)

How-to-Configure-WiFi-and-USB-for-Original-JLR-DoIP-VCI-17 (2)
Part 2: How to connect JLR DoIP VCI via USB

To setup USB connection, you need to download Bosch driver for VCI first:

https://mega.nz/#!aqwnhbQS!KS7QhERmZ4cCcZfvT2iXkdYN6ynz9vDQ3DmPQRGm0TU

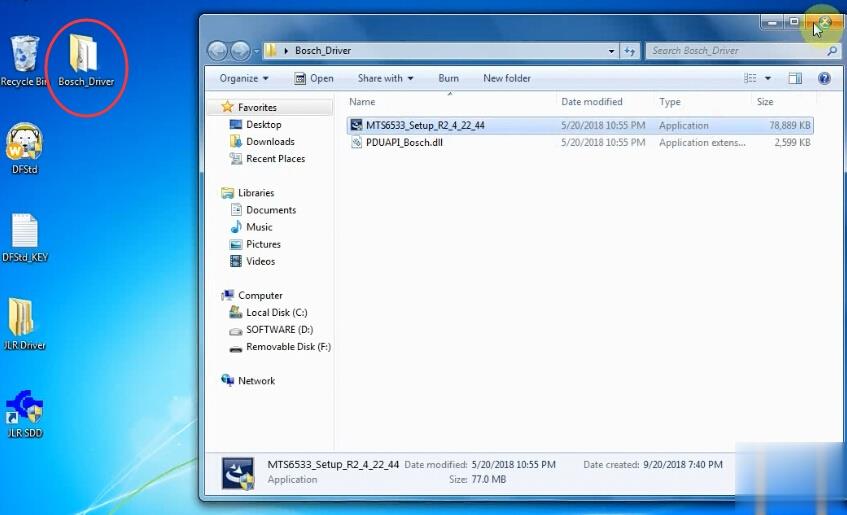
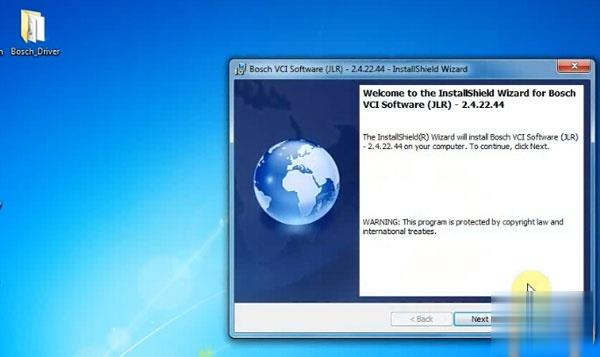
Open Bosch_Driver folder
How-to-Configure-WiFi-and-USB-for-Original-JLR-DoIP-VCI-18 (2)
Open MTS6533_Setup

How-to-Configure-WiFi-and-USB-for-Original-JLR-DoIP-VCI-19 (2)
Install Bosch VCI Software (JLR)
Press Next
Press Next
Press Install
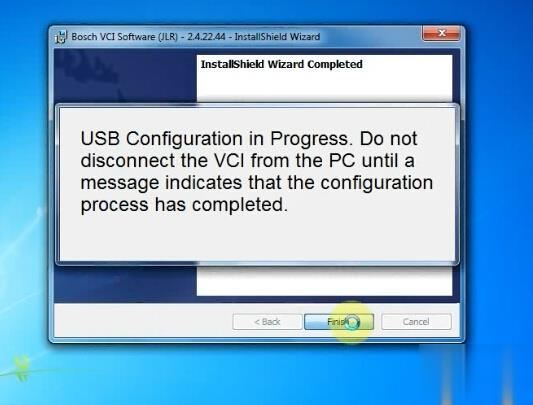
Finish installing Bosch VCI software
How-to-Configure-WiFi-and-USB-for-Original-JLR-DoIP-VCI-20 (2)
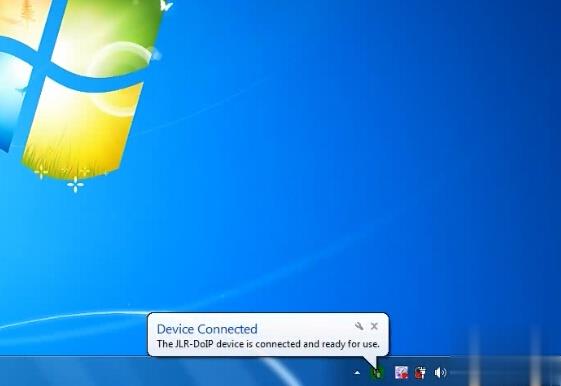
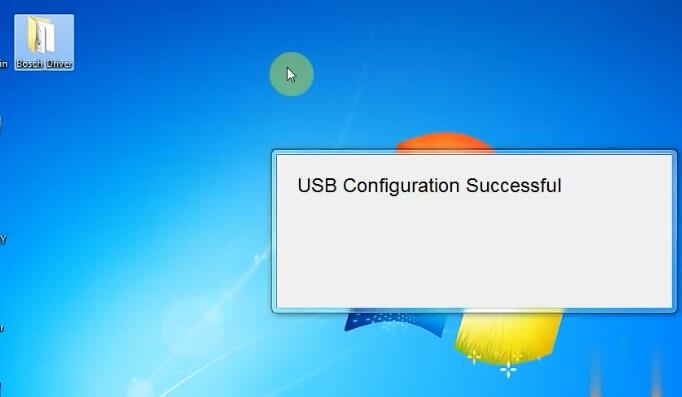
USB Configuration in progress. Don’t disconnect JLR VCI from PC until a message indicates that the configuration process has completed.

How-to-Configure-WiFi-and-USB-for-Original-JLR-DoIP-VCI-21 (2)

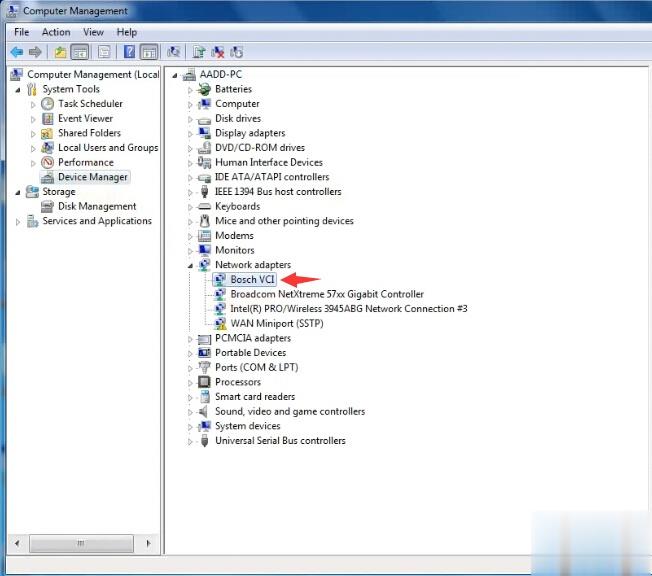
Open Device Manager to check the Bosch JLR DoIP VCI adapter is well connected

How-to-Configure-WiFi-and-USB-for-Original-JLR-DoIP-VCI-22 (2)

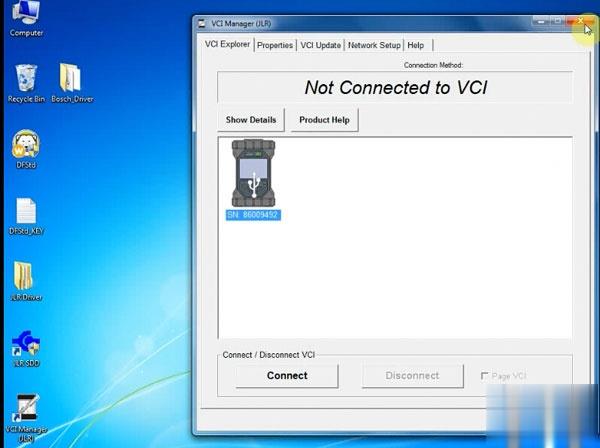
Open VCI Manager on desktop to make sure the Manager detect JLR VCI which indicates interface is well connected

How-to-Configure-WiFi-and-USB-for-Original-JLR-DoIP-VCI-23 (2)

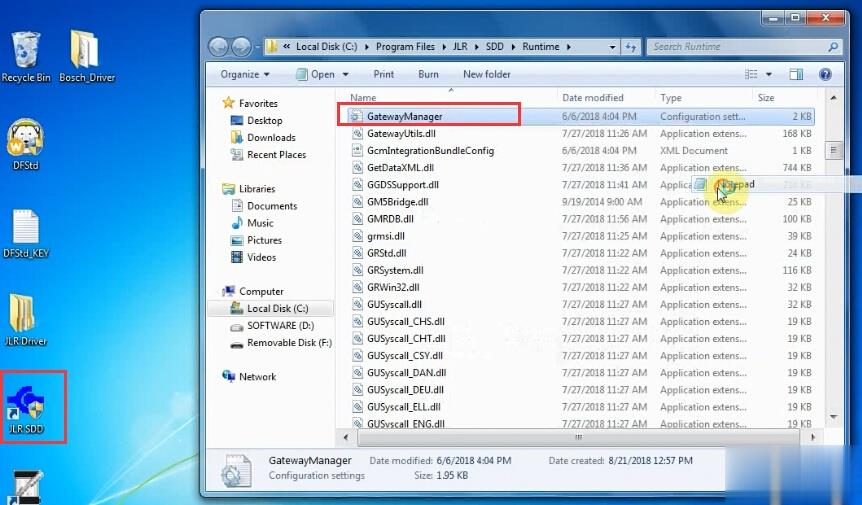
Right click JLR SDD software on desktop->Find File location C:/Program Files/JLR/SDD/Runtime

How-to-Configure-WiFi-and-USB-for-Original-JLR-DoIP-VCI-24 (2)

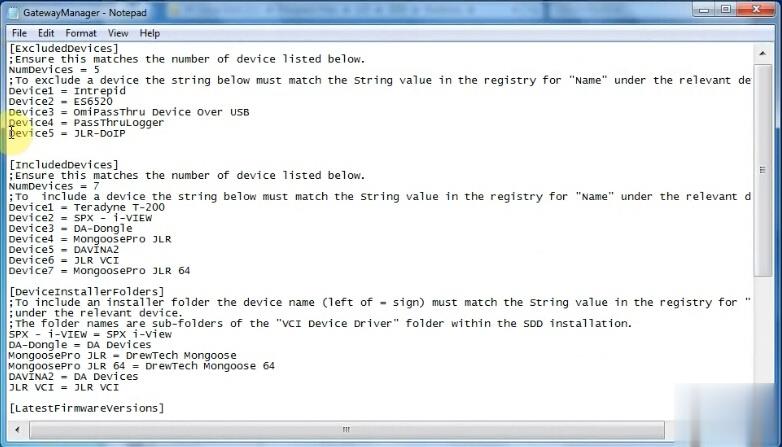
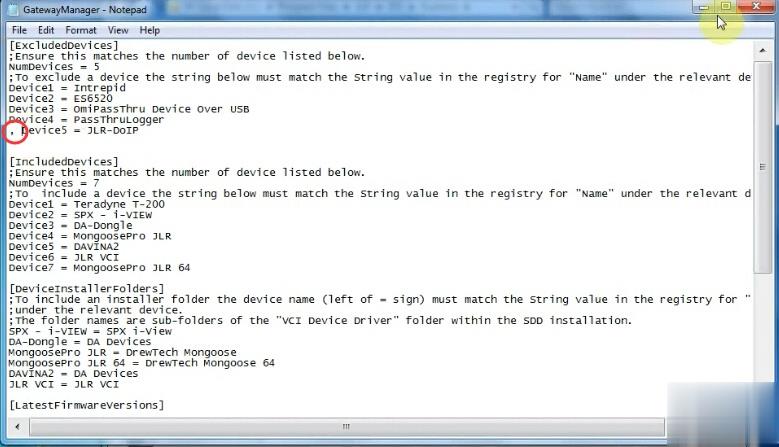
Open the GatewayManager with Notepad
Find “Device5 = JLR-DOIP” and change value to “,  Device5 = JLR-DOIP”

How-to-Configure-WiFi-and-USB-for-Original-JLR-DoIP-VCI-25 (2)

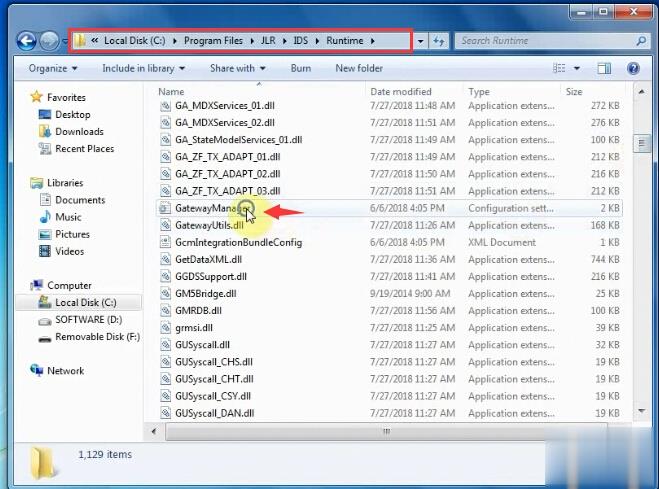
Find Go to C:/Program Files/JLR/IDS/Runtime
How-to-Configure-WiFi-and-USB-for-Original-JLR-DoIP-VCI-26 (2)
Open the GatewayManager with Notepad
Find “Device5 = JLR-DOIP” and change value to “,  Device5 = JLR-DOIP”

How-to-Configure-WiFi-and-USB-for-Original-JLR-DoIP-VCI-27 (2)

Setup completed.

Now you can run JLR SDD and Pathfinder software

How-to-Configure-WiFi-and-USB-for-Original-JLR-DoIP-VCI-28 (2)