Search site

Contact

Car diagnostic tools information by obd2tool

https://www.obd2tool.com

Welcome to my blog,here some auto diagnostic tools will be displayed. If you want to know more information,you can visit our official website: www.obd2tool.com.

lovelily750@gmail.com

News

Visitors notice

12/01/2014 07:47
Let your visitors know about news and events on your website as often as possible. You need to keep your website up-to-date so that your visitors will get used to visiting your pages regularly. You can use RSS feeds to deliver new articles directly to your readers.

Website launched

12/01/2014 07:46
Our new website has been launched today. Tell your visitors why you have started a new presentation and how it benefits them. Mention your goals and project advantages. Try to briefly give your visitors reasons why they should return to your pages.

The blog of OBD2 TOOL

CGDI BMW update for G F E programming & coding

02/04/2019 22:04
CGDI BMW update Engineer function: programming & coding for almost all  G series, F series, E series. Part1: CGDI BMW programming list: Testable BMW models: 1)E60(E60\E61\E63\E64 2) E65(E65\E66\E67\E68) 3)E7O(E7O\E71\E72) 4) E89(E81\E82\84\ E87\E88\E90\E91\E92\E93) 5)...

GM SPS Programming: Tech2 Tool Remote Mode ECU TIS2000 Calibration Update

01/01/2019 21:41
Here is the step-by-step instruction on programming GM (General Motors) ECUs with Tech 2 Scanner and SPS (Service Programming System) application in TIS2000. NOTE: Before using the SPS, make sure that the Tech 2 scan tool and the pc contain the latest software, the battery of the vehicle is...

Customer real experience with GM Tech 2 Scanner

12/23/2018 20:26
Here is the real experience by our customer Mr.Gary Richardson on GM Tech 2 Scanner. Bought the highest quality version as i didn’t want to risk any issues with the device, and it all works fine and i do not regret my purchase. It arrived pretty fast, but i got a £17 customs charge which i didn’t...

Normal Star Diagnosis vs Developer Mode

12/16/2018 19:51
Look here: Where exactly the differences between the normal Star Diagnosis and the Developer Version lie? Since these differences depend on the DVD version, you will get this nowhere reliable information. The Dev version contains features that are not always released for service and are...

Autel MX808 Immo Function Confirmed! Add New Keys to Honda

12/09/2018 16:01
Tested successfully! Today, we Obd2tool.com engineers has confirmed the immobilizer function of Autel MaxiCheck MX808 ! 100% tested on a Honda Acura and it’s working. 3 steps made it. Step 1: Add a new key Step 2: Check the key registered Step 3: Test the new key In detail… The new key (2+1...

Review on testing GM Tech2 and TIS 2000 Program

12/02/2018 12:48
Got some testing done with the GM Tech2 and TIS 2000 program incl. Tech2 view, service programming system, software download, snapshot upload display etc. 1. GM Tech 2 View: Main menu: Diagnostics Service Programming system View Captured data GM performance Parts Diagnostics Tool...

how to use X300 DP Plus to program new keys for Ford Escort 2018

11/27/2018 20:12
Ford Escort 2018 All Important Lost Programming by OBDSTAR X300 DP Plus This short article show a guide on how to use OBDSTAR X300 DP PLUS to system new keys for Ford Escort 2018 all keys lost. Process With Photographs and Texts: Connect OBDSTAR X300 DP Plus to Ford Escort by OBD...

Newest CAT ET 3 Wireless Adapter truck diagnostic tool Communication With Wi-Fi

11/25/2018 19:53
Newest CAT Caterpillar ET Wireless Adapter truck diagnostic tool Product Details Item specifics Item Width: 15cm Model Name: ET 3 wifi Item Length: 20cm Software Version: ET 3 wifi Brand Name: Arsmundi Special Features: wifi Hardware Version: ET 3 wifi Item Height: 8cm Voltage: V Item...

Can the icarscan change values for certain features

10/15/2018 17:00
I’ve been reading these posts for months now but still have some questions… Can the Launch ICARSCAN change values for certain features, such as if I add the Auto Headlight switch? I’ve read about forced firmware upgrades. Do you have to be online so this thing can check for licensing...

One year Update Service for Maxisys Elite, MS908P, MS908, MS906 and so on

10/07/2018 15:23
A single year Update Service for Maxisys Elite, MS908P, MS908, MS906 and so on. www.obd2tool.com delivers 1 year Update Service for Autel MS908P, Maxisys Elite, MS906, MS906BT and MS906TS. We are Autel authorized dealer. Purchasing from us, you are going to get 100% genuine, 1 year totally free...
<< 8 | 9 | 10 | 11 | 12 >>

How to Configure WiFi and USB for Original JLR DoIP VCI

03/28/2021 17:08

Part 1: How to Configure WiFi for Original JLR DoIP VCI /setup wireless connection?

Original Jaguar Land Rover diagnostic tool JLR DoiP VCI supports both USB and WiFi connection. Here’s the guide to configure the LAN setting.

How-to-Configure-WiFi-and-USB-for-Original-JLR-DoIP-VCI-1 (2)

Procedure:

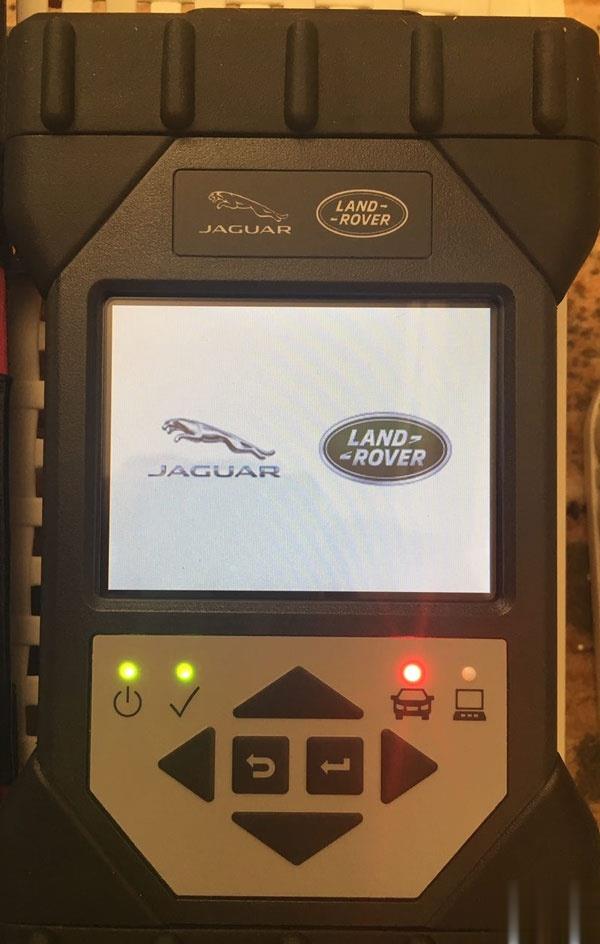
Connect JLR DoiP VCI W-F interface with vehicle

Connect the other end of VCI with laptop via USB cable

How-to-Configure-WiFi-and-USB-for-Original-JLR-DoIP-VCI-2 (2)

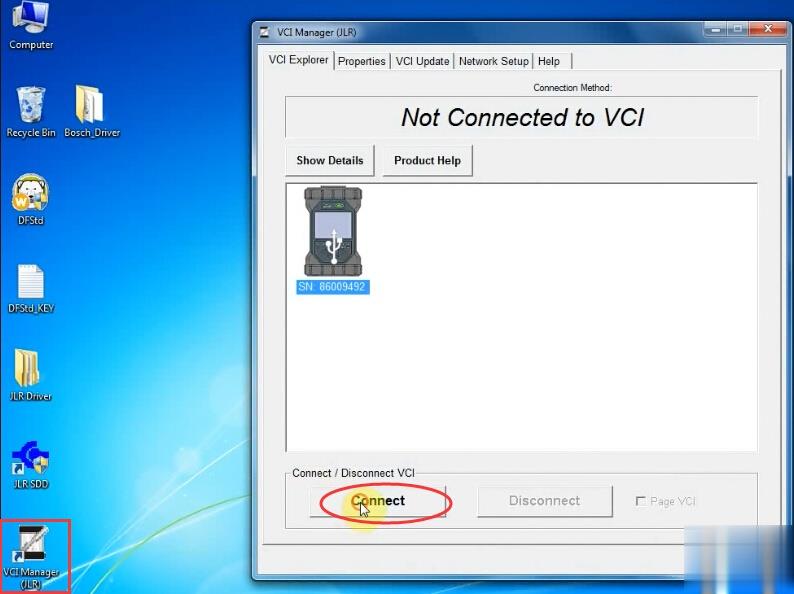
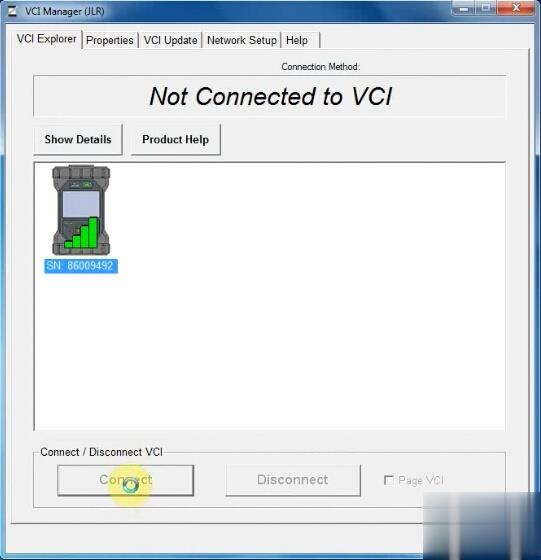
Open VCI Manager (JLR), press Connect

How-to-Configure-WiFi-and-USB-for-Original-JLR-DoIP-VCI-3 (2)

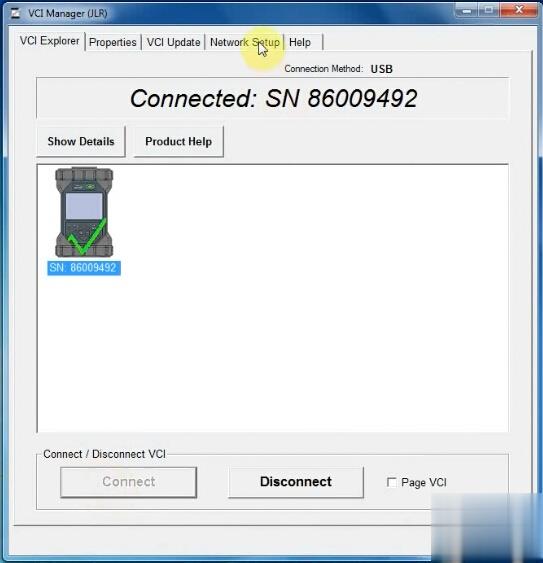
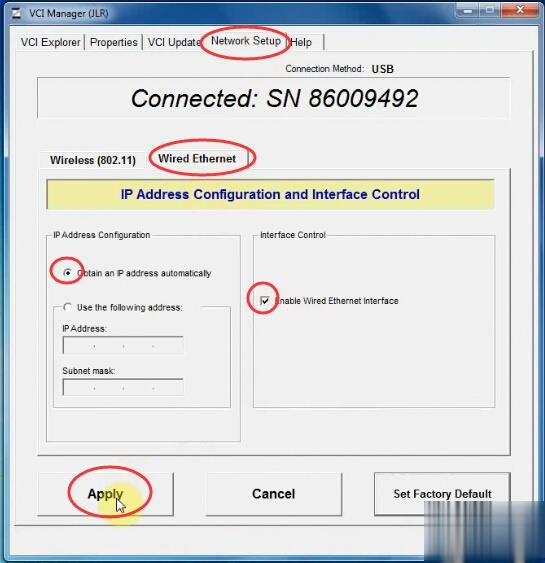
Choose Network Setup tab->Wired Etherent
How-to-Configure-WiFi-and-USB-for-Original-JLR-DoIP-VCI-4 (2)
Tick Enable Wired Etherent Interface

How-to-Configure-WiFi-and-USB-for-Original-JLR-DoIP-VCI-5 (2)

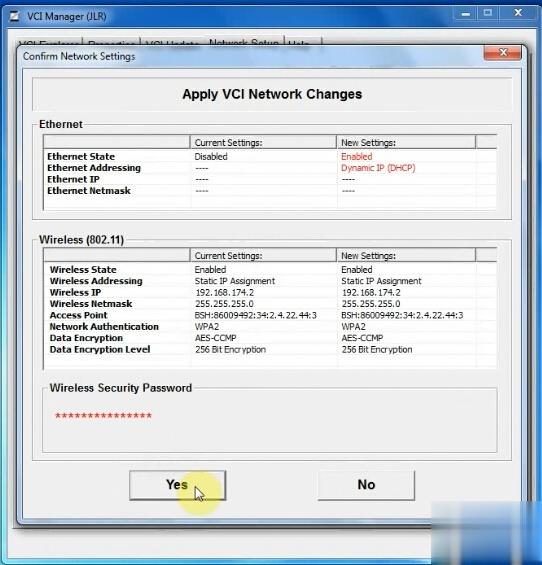
Press Apply button and Yes

How-to-Configure-WiFi-and-USB-for-Original-JLR-DoIP-VCI-6 (2)

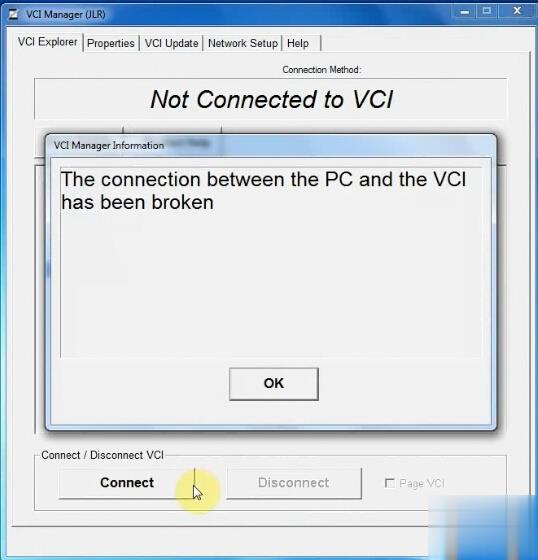
Then disconnect USB connection

Close VCI Manager

Open VCI Manager again

Press Connect

Go to Network Setup->Wired Etherent

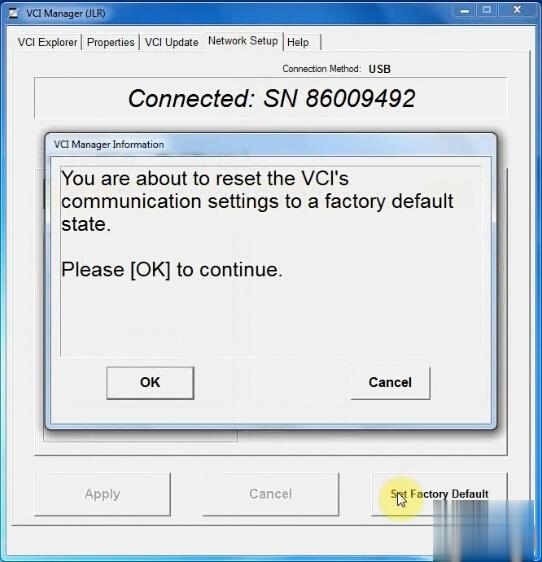
Press Set Factory Default

How-to-Configure-WiFi-and-USB-for-Original-JLR-DoIP-VCI-7 (2)

Press OK if system prompts you are about to reset the VCI communication settings to a factory default state.

How-to-Configure-WiFi-and-USB-for-Original-JLR-DoIP-VCI-8 (2)

Enable network connection

Press Set Factory Default again

How-to-Configure-WiFi-and-USB-for-Original-JLR-DoIP-VCI-9 (2)

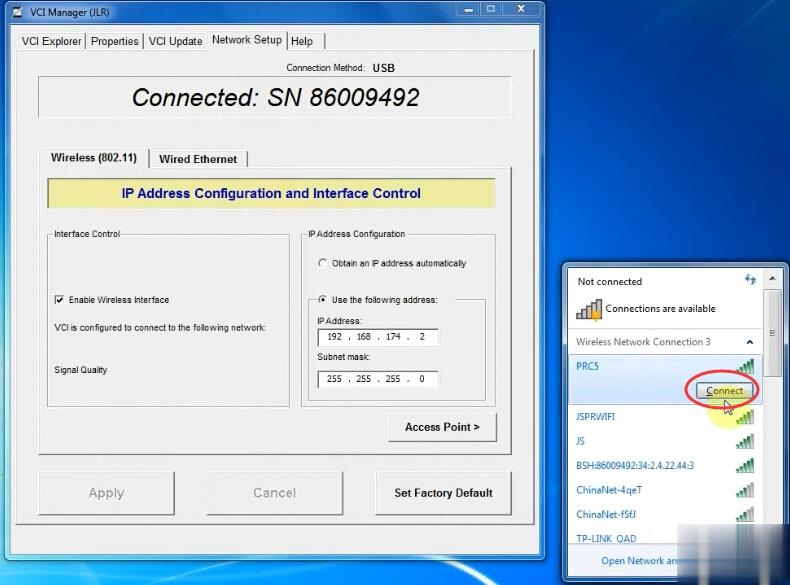
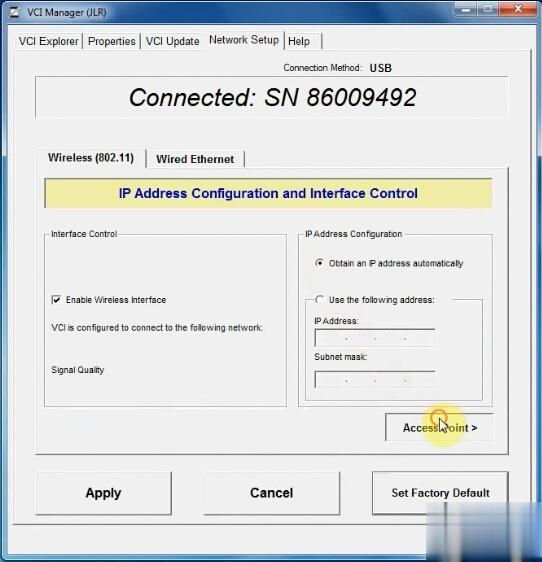
In Wireless (802.11), choose Obtain an IP address automatically, then press Access Point

How-to-Configure-WiFi-and-USB-for-Original-JLR-DoIP-VCI-10 (2)

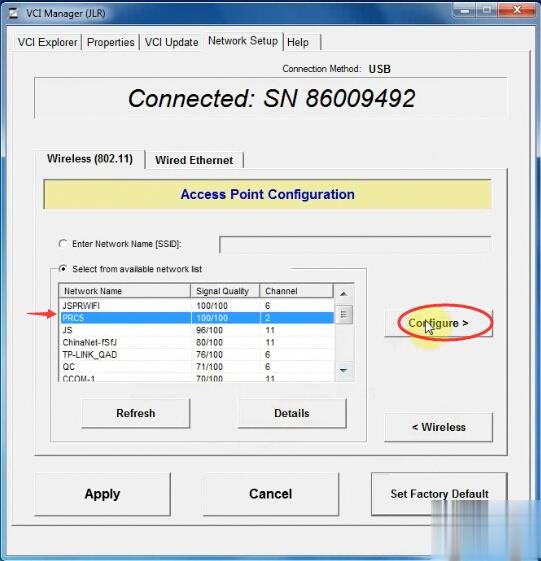
Choose Wireless resource which is the same as the your network
Press Configure

How-to-Configure-WiFi-and-USB-for-Original-JLR-DoIP-VCI-11 (2)

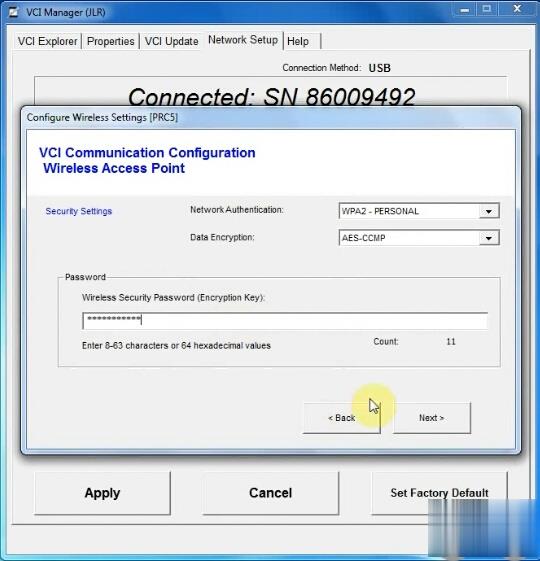
Enter wireless security password (encryption key)

Press Next

How-to-Configure-WiFi-and-USB-for-Original-JLR-DoIP-VCI-12 (2)

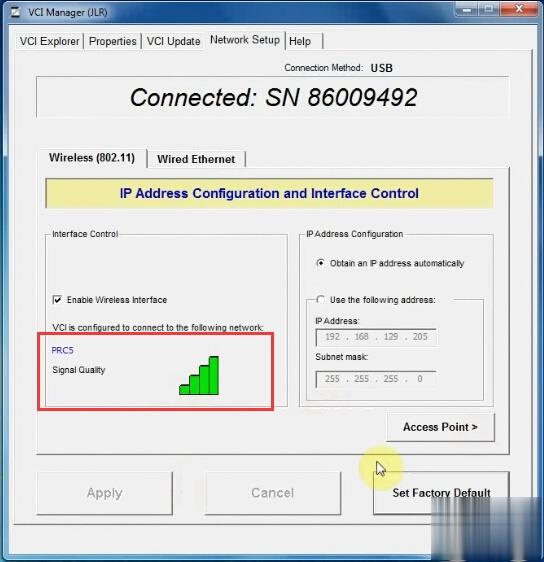
JLR VCI is configured to connect to your network

Disconnect and then Connect VCI

How-to-Configure-WiFi-and-USB-for-Original-JLR-DoIP-VCI-13 (2)

It shows WiFi connection is done

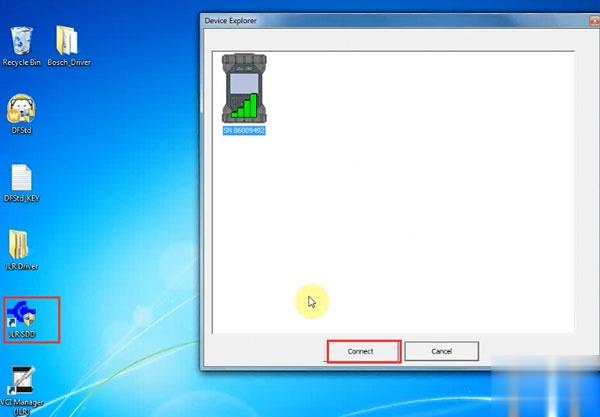
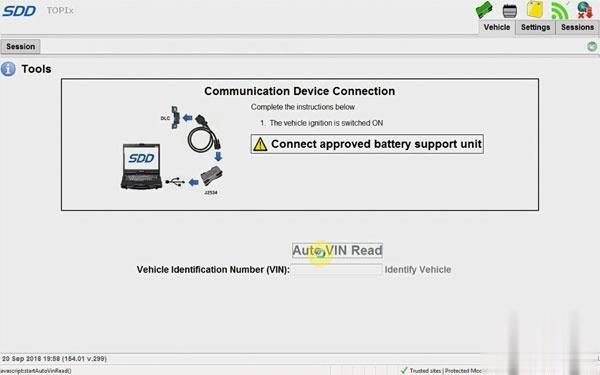
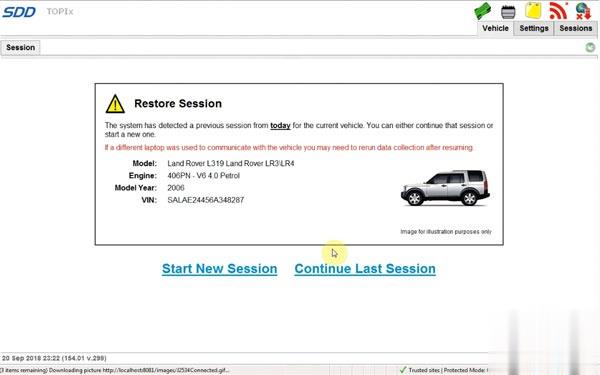
Open JLR SDD software on desktop

How-to-Configure-WiFi-and-USB-for-Original-JLR-DoIP-VCI-14 (2)

Press Connect

How-to-Configure-WiFi-and-USB-for-Original-JLR-DoIP-VCI-15 (2)
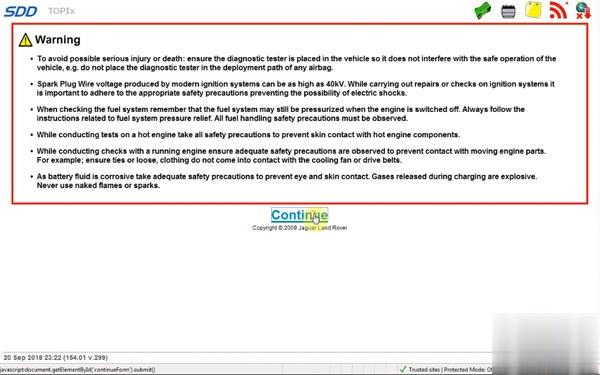
Now you can run SDD software for diagnosis
How-to-Configure-WiFi-and-USB-for-Original-JLR-DoIP-VCI-16 (2)

How-to-Configure-WiFi-and-USB-for-Original-JLR-DoIP-VCI-17 (2)
Part 2: How to connect JLR DoIP VCI via USB

To setup USB connection, you need to download Bosch driver for VCI first:

https://mega.nz/#!aqwnhbQS!KS7QhERmZ4cCcZfvT2iXkdYN6ynz9vDQ3DmPQRGm0TU

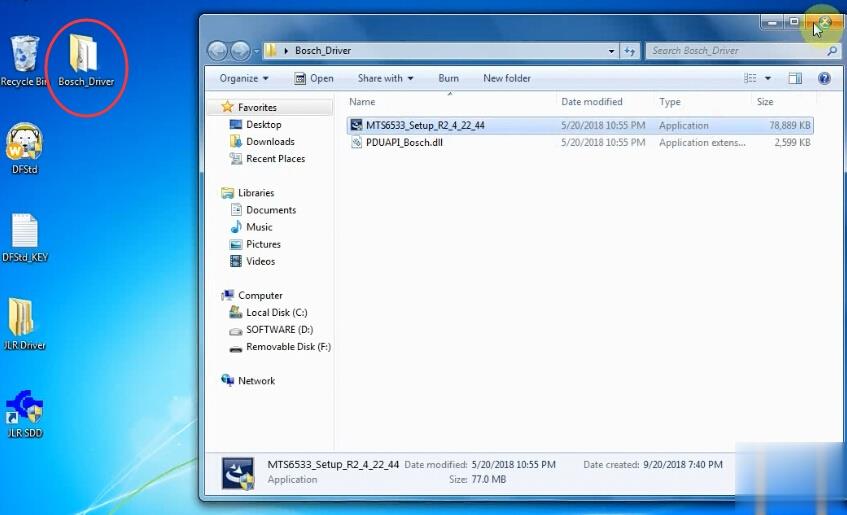
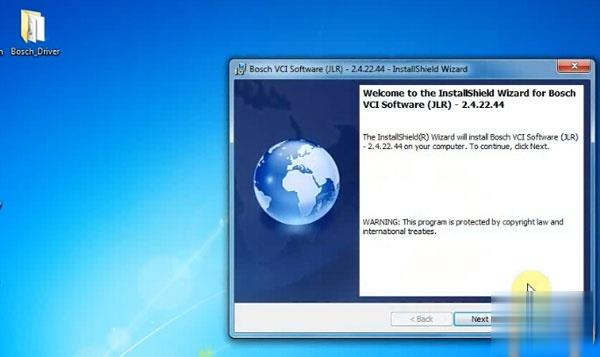
Open Bosch_Driver folder
How-to-Configure-WiFi-and-USB-for-Original-JLR-DoIP-VCI-18 (2)
Open MTS6533_Setup

How-to-Configure-WiFi-and-USB-for-Original-JLR-DoIP-VCI-19 (2)
Install Bosch VCI Software (JLR)
Press Next
Press Next
Press Install
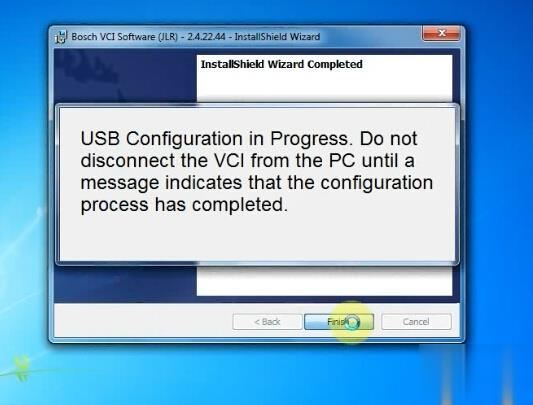
Finish installing Bosch VCI software
How-to-Configure-WiFi-and-USB-for-Original-JLR-DoIP-VCI-20 (2)
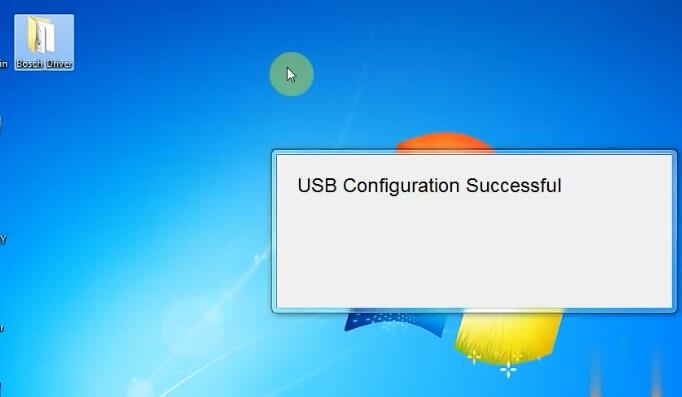
USB Configuration in progress. Don’t disconnect JLR VCI from PC until a message indicates that the configuration process has completed.

How-to-Configure-WiFi-and-USB-for-Original-JLR-DoIP-VCI-21 (2)

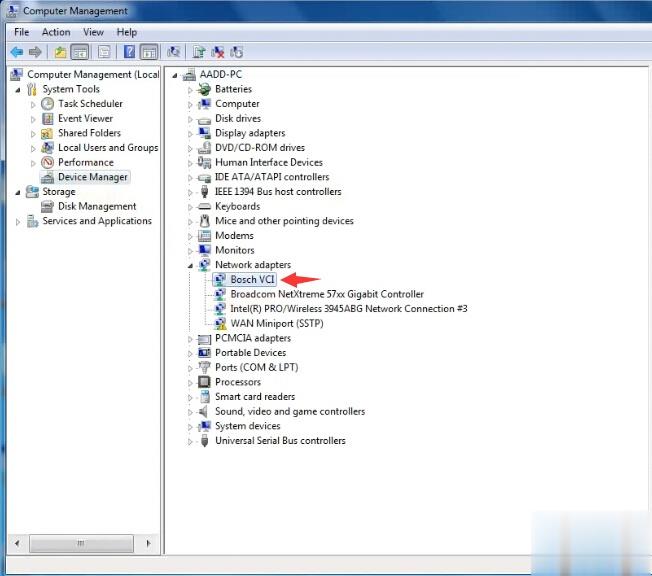
Open Device Manager to check the Bosch JLR DoIP VCI adapter is well connected

How-to-Configure-WiFi-and-USB-for-Original-JLR-DoIP-VCI-22 (2)

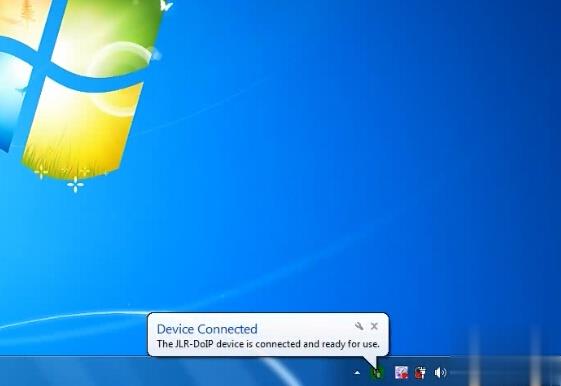
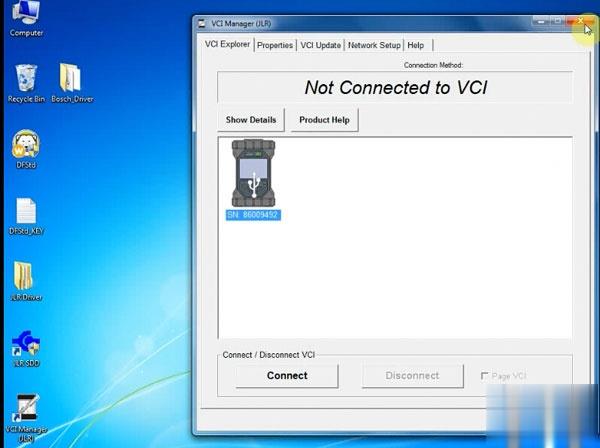
Open VCI Manager on desktop to make sure the Manager detect JLR VCI which indicates interface is well connected

How-to-Configure-WiFi-and-USB-for-Original-JLR-DoIP-VCI-23 (2)

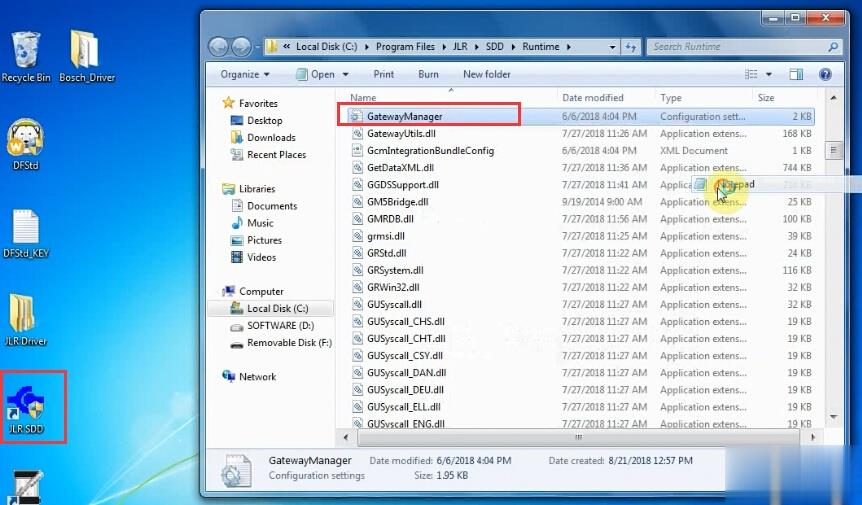
Right click JLR SDD software on desktop->Find File location C:/Program Files/JLR/SDD/Runtime

How-to-Configure-WiFi-and-USB-for-Original-JLR-DoIP-VCI-24 (2)

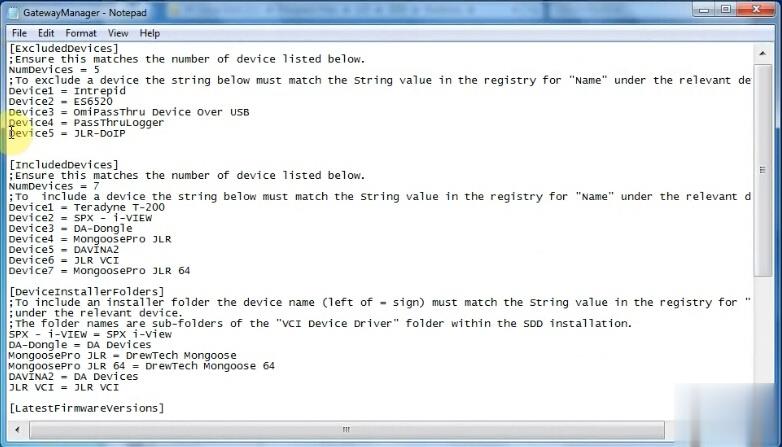
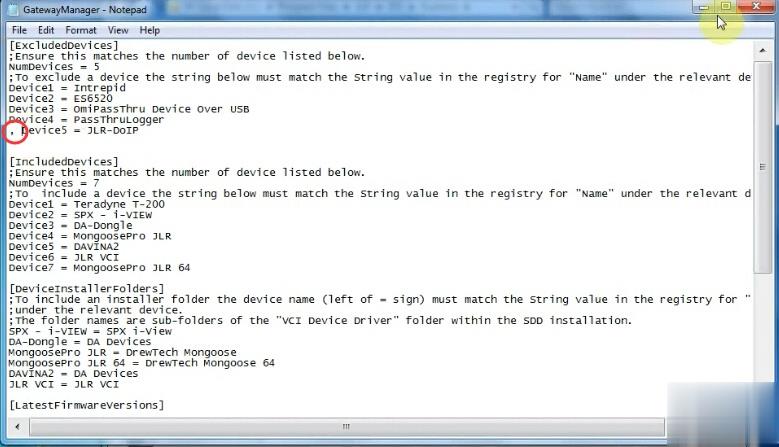
Open the GatewayManager with Notepad
Find “Device5 = JLR-DOIP” and change value to “,  Device5 = JLR-DOIP”

How-to-Configure-WiFi-and-USB-for-Original-JLR-DoIP-VCI-25 (2)

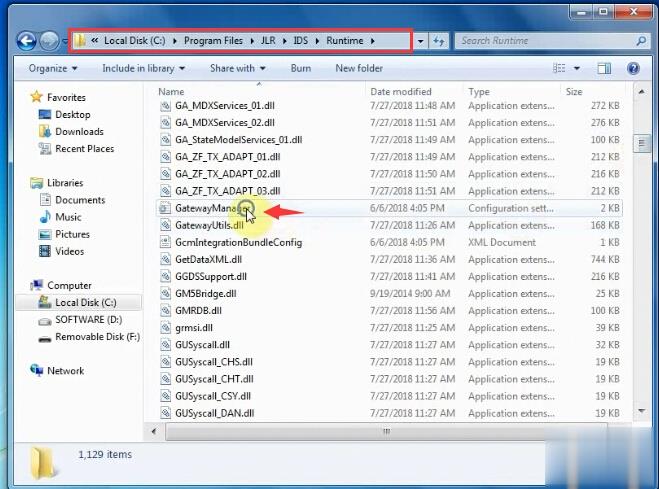
Find Go to C:/Program Files/JLR/IDS/Runtime
How-to-Configure-WiFi-and-USB-for-Original-JLR-DoIP-VCI-26 (2)
Open the GatewayManager with Notepad
Find “Device5 = JLR-DOIP” and change value to “,  Device5 = JLR-DOIP”

How-to-Configure-WiFi-and-USB-for-Original-JLR-DoIP-VCI-27 (2)

Setup completed.

Now you can run JLR SDD and Pathfinder software

How-to-Configure-WiFi-and-USB-for-Original-JLR-DoIP-VCI-28 (2)